Progressive Pattern Stitch Afghan
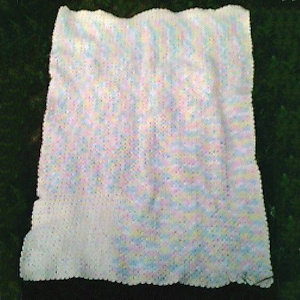 Designed by Julie A. Bolduc
Designed for Project Linus
This afghan is made starting at one corner and working outward to the desired width then to make it longer, I added more rows to just one side of the afghan. At first It ends up as a large square and lends itself well for making a great afghan for any charity where you make afghans for. Whether it be a small afghan for a preemie using baby yarn or a large afghan for a full size adult. I designed this afghan for Project Linus.
Materials Needed:
About 40 oz worsted weight yarn
I used Excellence by Nomis Knitting Worsted Weight in
3.5 oz skeins in Winter White 3 skiens and Ombre pastels 7 skiens.
Size H aluminum crochet hook
Yarn Needle
Yarn Thickness: 4mm
Gauge: 4dc per inch with a size H hook
Finished Size: Approx 40"x60"
Skill Level: Beginner
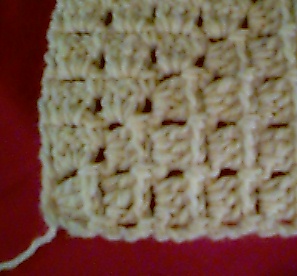
Note: This pattern starts in one corner and it grows from this corner. You will be working in rows but starting with a ring. Each row will turn a corner.
Each of the 3dc groups will be known as a shell and will be abbreviated as sh.
Instructions
With Winter White
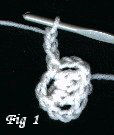
ROW 1: Ch5, join w/slst to first ch to form ring. Ch 3, work 3 dc in ring. Ch3, sc in ring. Ch3, turn. (See Fig1.)
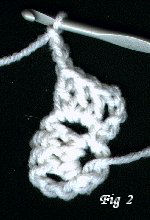
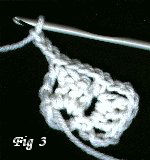
ROW 2: Here you will work on the side of the 3dc group you made. Then across the top to the first ch3. Work 3dc in ch3 sp shell (sh) made. (See Fig2) Ch3, Sc in same sp. Ch3, sk sh, sc in next ch3 sp. (See Fig3)Ch3, turn.
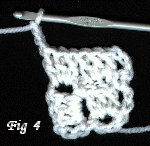
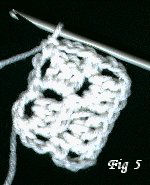
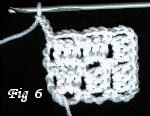
ROW 3: Sh in each ch3 sps across, (See Fig4) ch3, sc in same ch3 sp as last sp, (to go around the corner), ch3, sk shell, sc in last ch3 sp. (See Fig5). Ch3, turn.ROW 4: Sh in each ch3 sps across, ch3, sc in same ch3 sp as last sp, (to go around the corner), ch3, sk sh, sc in sp bet shs, ch3, sc in last ch3 sp. (See Fig6)Ch3, turn.
ROW 5: Sh in each ch3 sp across, ch3, sc in same ch3 sp as last sp, (to go around the corner), sk sh, *ch3, sc in sp bet shells. Rep from * across. Ch3, turn.
When making this a square afghan, repeat row 5 until you reach the desired size. When you reach your desired size, continue with edging instructions. Or, for this afghan, continue on with pattern.
ROW 6-37: Rep row5. At the end of the last row, fasten off white and tie on pastels where you put the last sc. Ch3, turn.
ROW 38-100: With pastels, rep row 5.
ROW 101: Sh in each ch3 sp across, ch3, turn.ROW 102: Sc in sp bet shs, ch3. Rep from beg across. Ch3, turn.
ROW 103-140: Rep rows 101 & 102 consecutively. Tie off pastels and tie on Winter White. Ch3, turn.
ROW 141-146: With winter white, rep rows 101 & 102 consecutively. Fasten off white.
Edging: Tie yarn onto bottom right corner of afghan. You can tell which side is correct if you put the starting ring on the left. You want to tie the yarn onto the bottom right corner, not where the starting ring is.*Ch3, sc bet shells. Rep from * all the way up the right side of the afghan and across the top. Then work the following in each and every ch3 sp around the perimeter of the afghan. (Sc, ch2, 2dc, ch2, sc). When you get back to the first sc, slst to first sc to join. Fasten off and weave ends into work.
Copyright © 1998 by Julie A. Bolduc Designed in June 15,1998. f120003
JPF Crochet Club where Crocheting is Just Plain Fun https://www.jpfun.com This pattern is for personal use only and not to be resold.
