
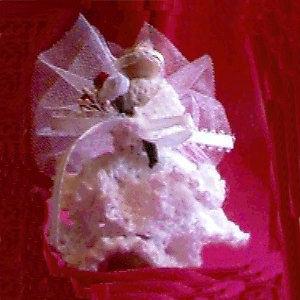
Wedding Angel
 Designed by Julie A. Bolduc
This little angel would look great on the Bride's table at the reception over looking the guests of honor. She is holding a precious little bouquet of roses.
- Materials Needed:
- Small amount white Luster Sheen
- Size D aluminum crochet hook
- Wooden Doll pin and stand
- Glue
- Tulle or veil netting
- Miniature ribbon roses
- 2 White calyxes
- floral tape
- 12" white ¼" wide picot edged satin ribbon.
- 1 fake adjustable wedding band in gold.
- Sewing thread white
- Sewing needle
- Tapestry needle
- Yarn Thickness: 10thread
- Gauge: 8sc="
- Finished Size: 4" high
- Skill Level: Beginner
Body:
RND 1: Ch12, join with slst to first ch to form ring. Ch 3, work 1 dc in each ch around. Join w/slst to top of ch3. (you now have 12 dcs total)
RND 2: Ch3, work 1 dc in each dc around. Join w/slst to top of ch3.
RND 3: Repeat rnd 2.
RND 4: Work in back loops only, Rep RND 2.
SkirtRND 5: Work in both lps. Ch3. *(2dc, ch2, 2dc) in next st. Dc in next st. Rep from * around. Join w/slst to top of ch3.
RND 6 & 7: Ch3, *(2dc, ch2, 2dc) in ch2 sp. Sk 2dc, Dc in dc. Rep from * around. Join w/ slst to top of ch3.
RND 8: Sc in same st as slst. *Ch4, slst to 4th ch from hook. Sc in next st. Rep from * around. Join w/slst to first sc. Tie off thread.
Top Skirt
Tie thread in RND 4 in the front lps and for RNDs 1 & 2 of top skirt, repeat Rnds 5-6 but work only in these front loops. Then for the 3rd rnd (last rnd), Rep rnd 8. Weave ends into work.
Arms
Flatten body so that the Ch3's are at the back of the angel, Tie thread on to Starting ch lps on the sides of the top of the body where the shoulders would be. Ch 10, dc in 3rd ch from hook, Ch3, sc in same st as dc. Now work 1 dc in each ch across and slst to where at the next rnd right below where you tied on the thread. Secure into place and tie off. Repeat with other side for other arm.
Wings
Cut 2 pieces of tulle 4"x5". Place them together evenly and run a running stitch with the sewing thread in the center from 4" edge to 4"edge. Gather up tightly and secure with knots. Sew the wings onto the back of the angel body.
Head Piece
Cut a piece of tulle, 3" by 1" long. Sew a running stitch down the center of the whole 3" length of it and gather up tightly. Secure with knots. Set aside.
Bouquet
Use 3 each of the mini roses in two colors to make a bouquet and combine them with 2 white calyxes. Arrange them until you are happy with the look. Then wrap the stems in floral tape working diagonally down the stems then up the stems working your way up close to the head of the bouquet. Then break tape and smooth down. Trim the stems to about 1" long. Set aside.
STEP 1.Glue the body to the wooden doll pin just below the knob (head). Allow to dry.
Step 2.Lay the angel down on the table arms facing you. With yarn needle bring ribbon through the hands on th arms where the sc was made and pull through both hands at the same time. Lay the bouquet bet the hands as if she were holding the bouquet and pass both ends of the ribbon through the ends of the hands, crossing each other. Tie tightly and then tie into a bow. Trim ends of ribbon as needed.
Step 3. Glue head piece onto head then the gold ring onto the head piece.
Step 4. Set the pin into the stand. The End.
Design Written in June 1998 Copyright © 1998 by Julie A. Bolduc p104002
JPF Crochet Club where Crocheting is Just Plain Fun This crochet pattern is for personal use only and is not to be resold.
Sheetworks Studio Version 2.5 — Free Download! - Two New Categories Added, Graph Paper and Quilt Blocks
All items in our online shop ship free within the US only. I currently offer U.S. shipping only and it is from rural Maine. Delivery can vary from 2–14 days depending on your distance from Maine. Expedited shipping is not available.
Please note: I am now selling all of my paper bead making tools and other items from this web site using Paypal payments.
I have removed all of my paper bead making tools from Amazon. My Kindle crochet pattern books and paper template paperback books continue to be available on Amazon, as they are printed and fulfilled directly by Amazon. A limited number of paper bead making tools remain available on Etsy but I am not linking to those tools from this site.
Random Quick Tip!
Crochet Wreaths & SuchSave all of your ring shaped trash like the core of a transparent tape roll. You can use these items as wreath or napkin ring bases to crochet on. I have designed two patterns using these empty tape rolls. One is a wreath and the pattern is available for free at . The other one is a napkin ring pattern and it's available at .