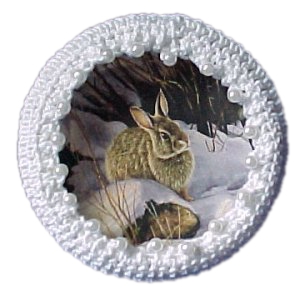
Beaded Frame Fridgie
 Designed By Julie A. Bolduc
This fridgie pattern is easy to make and uses a lid from the dry powder drink mix that I use the container to make my pencil cups from.
Materials Needed
Size 5 crochet cotton in white.
Size 4 Steel crochet hook
18 4mm white pearl beads
Fine tapestry needle
Picture or copy of picture
Scissors
Double faced tape
Magnet Piece
Pencil
Yarn Thickness: 2mm
Gauge: 2nd round is 1½""diam
Finished Size: 3" diam
Skill Level: Beginner
Instructions
RND 1: String all beads on thread. Ch6. Join w/slst to first ch to form ring. Ch3. 17dc in ring. Join w/slst to top of ch3.
RND 2: Ch3. Dc in same st as slst. 2dc in each st around. Join w/slst to top of ch3.
RND 3: Ch3, dc in same st as slst. Dc in next st. (2dc in next dc. Dc in next dc.) Rep bet () 6 times more. Dc in next dc, 2dc in next dc 8 times. Dc in each of the last 3 dc. Join w/slst to top of ch3. (52 dc.)
RND 4: Ch3. Dc in same st as slst. Dc in each of the next 2 dc. *2dc in next dc. Dc in each of the next 2 dc. Rep from * around. Dc in last dc. Join w/slst to top of ch3. (69 dc)
RND 5: Ch3. Dc in same st as slst. Dc in each of the next 22 dc. *2dc in next st. Dc in each of the next 22 dc. Rep from * one more time. Join w/slst to top of ch3. (72dc)
RND 6: Ch3, dc in each dc around. Join w/slst to top of ch3.
RND 7: Ch1. Sc in same st as slst and in each of the next 3 dc. Pull up a bead. Ch1. *Sc in each of the next 4 dc. Pull up a bead, ch1. Rep from * around. Join w/slst to first sc. Fasten off leaving a 24" end. Weave beginning end into work. Weave ending end through the last round to gather up. Set aside.
Finishing : Cut picture into circle to fit into lid. Place picture into lid with the double faced tape. Turn the crochet work inside out so that the wrong side is facing out, this is now the side you want to see. Place the lid into the crochet work. Gather up the last round and secure so it will not come undone. Weave end into work and trim. Glue magnet to back. Enjoy!! You can also use it as an ornament by attaching a hanger to the top.
Design written on Friday, July 16, 2004. Copyright ©2004 By Julie A. Bolduc f105001

