Monster Scull Candle Holder
 Designed By Julie A. Bolduc
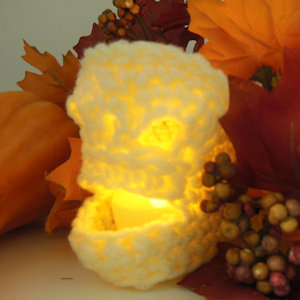
This little monster scull candle holder looks really creepy in the dark with the battery operated tea light candle on! It would make a cute addition to your Halloween table!
Materials Needed
Small amount off white worsted weighty acrylic yarn
Size H/8 or 6mm aluminum crochet hook
Yarn needle for weaving in ends
1 crochet stitch marker
1 Battery operated tea light candle.
Yarn Thickness: 4mm
Gauge: 4sc=1"
Finished Size: 3" x 3" x 2"
Skill Level: Beginner to intermediate
Special Stitch Scfbb Single Crochet Front Back Bobble: Insert hook in back lp only of next st. yo, draw up a loop. You will now have 2 lps on hook. Yo, draw through one lp on hook. Now, insert hook in front lp of same stitch from the inside toward you, yo draw up a lp. You should now have 3 lps on hook. Yo and pull through all 3 lps on hook
InstructionsRND 1: Ch2. 6sc in 2nd ch from hook. Mark first sc and move the marker up with each round keeping it on the first sc of each round.
RND 2: 2sc in each sc around. (12 sc)
RND 3: 2sc in next sc, sc in next sc, 6 times. (18sc)
RND 4: 2sc in next sc. Sc in each of the next 2 sc. Hdc in next sc. 2dc in next sc. Hdc in next sc. Sc in each of the next 2 sc. 2sc in next st. Sc in each of the next 9 sc. (21 sc)
RND 5: Work in back loops only for this round only, sc in each st around. (21 sts)
RND 6: Sc in each of the next 4 sts. Scfbb in each of the next 8 sts. Sc in each of the next 9 sts. (21 sts

RND 7: Sc in each of the next 4 sts. Ch8. Sk 8 sts. Sc in each of the next 9 stitches.
RND 8: Sc in each of the next 4 sts. Scfbb in each of the next 8 chs. It is possible to do this stitch in each chain stitch. Sc in each of the next 4 sts. 2sc in each of the next 6 sc. (28sts)
RND 9: Sc in each of the next 3 sts. Sk next st. Slst in each of the next 8 scfbb. Sk next st. Sc in each of the next 15 sts. (26 sts)
On the next round, you are going to work some stitches behind the slip stitches of RND 9 so you will actually be working on the scfbb of rnd 8.RND 10: Sc in each of the next 3 sts. Sc in next slip stitch. Now you will work behind the next 6 slip stitches. Sc in each of the next 2 sts behind slst. Ch7. Sk next st. Sc in next st behind slst. Ch3. Sc in next st behind slst. Ch7. Skip 1 st. Sc in next st behind slst. Sc in next slst. Sc in each of the next 15 sts.
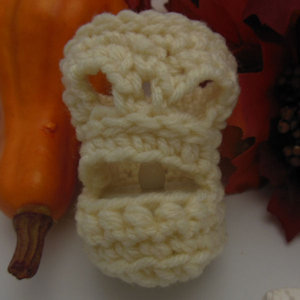
You just now formed the eyes and nose holes.RND 11: Sc in each of the next 4 sts. Sk next st. Dc in next st. Sk next ch. Sc in each of the next 5 chs. Sc in next ch3 sp. Sc in the 2nd, 3rd, 4th, 5th and 6th ch of the next ch5 sp. Sk next ch. Dc in sc. Sk next sc. Sc in each of the next 14 sts.
RND 12: Sc in each of the next 3 sts. Sk next st. Sc in each of the next 5 sts. Sk next st. Sc in each of the next 5 sts. Sk next st. Sc in each of the next 15 sts.
RND 13: Sl st in each st around. Fasten off and weave ends into back of work.
Turn battery operated tea light candle on and slip into the base of the candleholder!
Safety Warning! Do not use a real candle in this candle holder, it will catch fire or melt and could cause serious injury or property damage!Design written on Saturday, October 12, 2013. Copyright ©2013 By Julie A. Bolduc p116026

