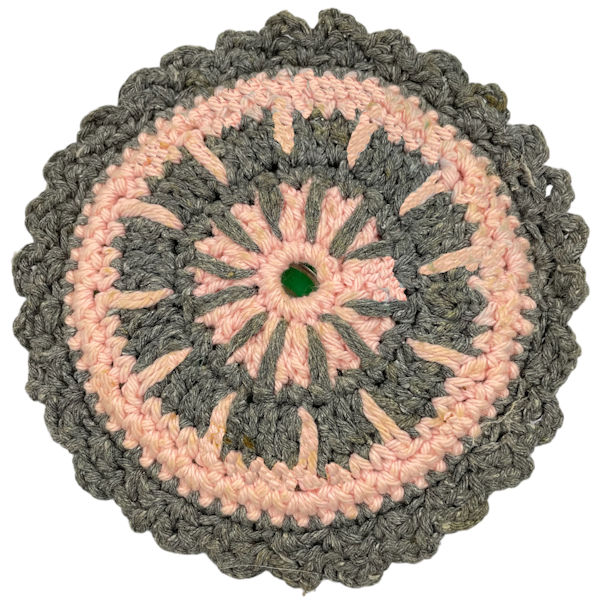
Spiked Hot Pad
 Designed By Julie A. Bolduc
This CD hot pad is quick to make. If you have old CD's lying around, this would be a great way to use them. You can also use this pattern as a potholder. Just cut 2 pieces of felt 6" in diameter and place them inside instead of using a CD. You could actually make a kitchen set, a hot pad and potholders that all match!
Materials Needed
Worsted weight cotton yarn in 2 contrasting colors. I used Aunt Lydia's Denim in grey and Peaches & Creme in pink.
1 old CD
Size H/8 or 5mm aluminum crochet hook
Yarn Needle
Yarn Thickness: 3mm
Gauge: 4sc =1"
Finished Size: 7" diameter
Skill Level Beginner to intermediate
Spike Single Crochet. (Ssc): According to the Harmony Guide to crocheting page 30. This stitch can be worked over 1 or more rows (usually sc rows) but for this pattern, it is worked over a dc row in the following way. Insert hook in next st 1 row straight down, yo, draw lp through and up to height of current row, yo draw through both lps on hook.
Instructions
Front:
RND 1: With Pink. Ch6. Join w/slst to first ch to form ring. Ch1. 12 sc in ring. Join w/slst to first sc.
RND 2: Ch3. Dc in same st as slst. 2dc in each st around. Join w/slst to top of ch3. Fasten off pink.
RND 3: Join grey in any st. Ch1. Sc in same st as joining. Ssc. *2sc in next st. Ssc. Rep from * around. Join w/slst to ch1. NOTE: You will be putting 1 Ssc in top of each of the 12 stitches of the first round.
RND 4: Ch3. Dc in same st as slst. Dc in each of the next 2 sts. *2dc in next st. Dc in each of the next 2 stitches. Rep from * around. Join w/slst to top of ch3. Fasten off grey.
RND 5: Join pink in any stitch. Ch1. Sc in each of the next 2 stitches. Ssc. *Sc in each of the next 3 sts. Ssc. Rep from * around. Join w/slst to ch1. (you should have 48 sts around.)
RND 6: Ch1. Sc in same st as slst. Sc in each of the next 3 sts. *2sc in next st. Sc in each of the next 3 sts. Rep from * around. Join w/slst to ch1. (You should now have 60 sts around.) Fasten off pink. Set Front piece aside.
Back:
RND 1: Front: With Pink. Ch6. Join w/slst to first ch to form ring. Ch1. 12 sc in ring. Join w/slst to first sc.
RND 2: Ch3. Dc in same st as slst. 2dc in each st around. Join w/slst to top of ch3.
RND 3: Ch1. Sc in same st as slst. *Sc in next st. 2sc in next st. Rep from * around. Join w/slst to ch1.
RND 4: Ch3. Dc in same st as slst. *Dc in each of the next 2 sts. Dc in next st. Rep from * around. Join w/slst to top of ch3.
RND 5: Ch1. Sc in same st as slst. *Sc in each of the next 3 sts. 2Sc in next st. Rep from * around. Join w/slst to ch1. You should have 60 sts around.
RND 6: Ch1. Sc in each st around. Join w/slst to ch1.
Assembly
RND 1: Put front and back pieces together wrong sides facing each other. With grey. Work 1 sc in each st around joining the two pieces together. Before closing, insert CD then finish to close.
RND 2: Edging. Ch3. Dc in same st aslst. Sk next st. Sc in next st. Ch2. *Dc in same st as last st. Sk next st. Sc in next st. Ch2. Rep from * around. Join w/slst to base of ch3. Fasten off and weave all ends into back of work.
Design written on Tuesday, September 12, 2000. Copyright ©2000 By Julie A. Bolduc f118006

