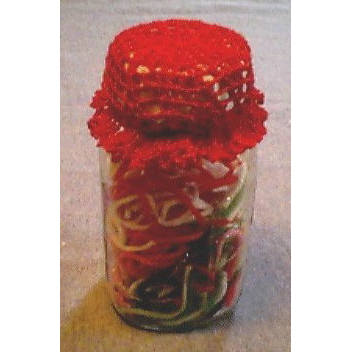
Lacy Jar Topper
 Designed By Julie A. Bolduc
This jar topper would look best slipped over a white cloth covering the top of a jar. This is my first attempt at designing one and even making one so it is probably different from any you have seen.
- Materials Needed:
- Small amount size 10 Crochet Cotton.
- Southmaid in Red was used.
- Size 6 steel crochet hook.
- Elastic band 1/8" wide 2" diameter unstretched.
- White piece of muslin cut into a circle with pinked edges 8" in diameter.
- Tapestry Needle for Weaving in ends
- Yarn Thickness: 10thread
- Gauge: 9sc=1"
- Finished Size: Fits over a small mouth canning jar lid.
- Skill Level: Intermediate
Instructions
RND 1: Ch6, join w/slst to first ch to form ring. Slst into ring. *Ch6, sc in ring. Rep from * 10 times more.
Ch3. Join w/ dc in first ch of ch6.
RND 2: Ch2. *Sc in next ch6 lp. Ch2. Rep from * around. Join w/slst to dc.
RND 3: Slst into the first ch2 sp. Ch3. Dc in same sp. Ch3. Sc in next ch2 sp. Ch3. *2dc in next ch2 sp. Ch3. Sc in next ch 2 sp. Ch3. Rep from * around. Join w/slst to top of ch3 s.
RND 4: Ch3. Dc in next dc. *Ch3. Dc in next ch3 sp. Ch1. Dc in next ch3 sp. Ch3. Dc in each of the next 2 dc. Rep from * around ending with a slst in top of ch 3 to join.
RND 5: Ch3. Dc in next dc. *Ch3. Dc in next ch3 sp. Ch1. Dc in next ch 1 sp. Ch1. Dc in next ch3 sp. Ch3. Dc in each of the next 2 dc. Rep from * around ending with a slst in top of ch 3 to join.
RND 6: Ch3. Dc in next dc. *Ch3. Dc in next ch3 sp. (Ch1. Dc in next ch 1 sp.) Rep bet ( ) once more. Ch1. Dc in next ch3 sp. Ch3. Dc in each of the next 2 dc. Rep from * around ending with a slst in top of ch 3 to join.
RND 7: Ch6. Dc in next dc. *Ch3. Sk the ch3 sp. Dc in next ch1 sp. Ch1. Dc in next ch1 sp. Ch1. Dc in next ch1 sp. Ch3. Sk next ch3 sp. Dc in next dc. Ch3, dc in next dc. Rep from * around ending with a slst in 3rd ch of ch6 to join.
RND 8: Ch6. Sc in ch3 sp. Ch3. Dc in next dc. *Ch3. Sk next ch3 sp. Dc in next ch1 sp. Ch1. Dc in next ch1 sp. Ch3. Sk next ch3 sp. Dc in next dc. ch3, sc in next ch3 sp. Ch3. Dc in next dc. Rep from * around ending with a slst in 3rd ch of ch 6.
RND 9: Ch6. Dc in ch3 sp. Ch1. Dc in next ch3 sp. Ch3. Dc in next dc. *Ch3. Sk next ch3 sp. Dc in next ch1 sp. Ch3. Sk next ch3 sp. Dc in next dc. Ch3. Dc in ch3 sp. Ch1. Dc in next ch3 sp. Ch3. Dc in next dc. Rep from * around ending with a slst in 3rd ch of ch6 to join.
RND 10: Ch6. Dc in ch3 sp. Ch1. Dc in next ch1 sp. Ch1. Dc in next ch3 sp. Ch3. Dc in next dc. *Ch3. Sk the two ch3 sps. Dc in next dc. Ch3. Dc in ch3 sp. Ch1. Dc in next ch1 sp. Ch1. Dc in next ch3 sp. Ch3. Dc in next dc. Rep from * around ending with a slst to 3rd ch of ch6 to join.
RND 11: Sc this round onto the elastic band working in the following manner. Work 5 sc in each ch3 sp and 2sc in each ch2 sp around. You may need to stretch the elastic band as you work over it. Join w/slst to first sc.
RND 12: Ch6. *Sk next sc. Sc in next sc. Ch6. Rep from * around ending with a ch3 and dc in to the first ch of the first ch6.
RND 13: Ch6. Sc in next ch6 lp. Rep from beg around. Join w/slst to first ch of ch6. Fasten off and weave ends into work.
An easy way to make a circle is to use a large coffee can lid as a template and with a pencil, trace around the primeter of the lid on to the fabric. Then with pinking shears cut out the circle following the pencil line. If you need to stablize the fabric, you can iron on a piece of freezer paper shiny side facing the fabric then draw the circle then cut it out. This actually works better than trying to cut the fabric without the paper.
Place fabric circle over jar lid then slip this jar cap over the fabric.Designed on Monday, October 12, 1998. Copyright © 1998 By Julie A. Bolduc p118002

