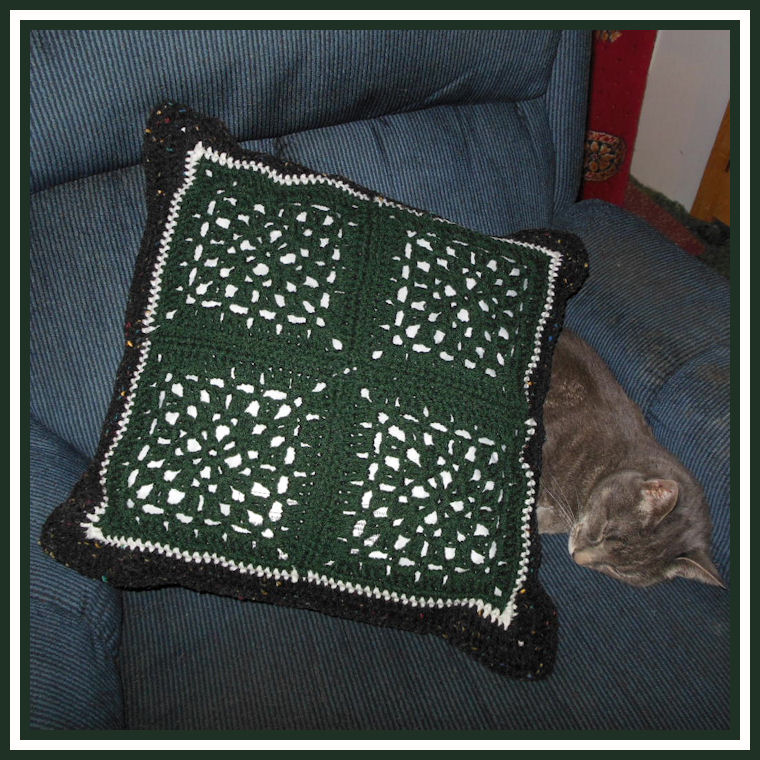
Two by Two Granny Square Pillow

Designed by Julie A Bolduc
This crocheted pillow can be made with any 6in x 6in granny square. This one is made with the Kingfield Square which on this site. It is fun and easy to make and you can use what ever color combination you can think of. The kitty in the picture is my cat Charlie*** who passed away in 2018.
Materials Needed
Worsted weight acrylic yarn 5oz main color Red Heart Super Saver Dark Sage
Worsted weight acrylic yarn 2oz contrasting color Red Heart Super Saver Black Fleck
Worsted weight acrylic yarn Scrap of a 3rd color Red Heart Super Saver off white
1 square pillow form, 16" x 16"
Size I-9 or 6mm aluminum crochet hook
Yarn needle for stitching squares together and weave in ends
Yarn Thickness: 4mm
Gauge: 4dc=1"
Finished Size: 17" x 17"
Skill Level: Beginner to Intermediate
NOTE: This instructions are basically how you can take any 6 inch granny square and make a pillow with them. These instructions can be easily adapted to any granny square out there.
Instructions Step 1: I used the Kingfield Square to make my granny squares but you can really use any 6" x 6" granny square you want. Make 8 the same.
Step 2: Using a lacing stitch, to make your seams flat, stitch the squares together in 2's. When you are done you should have 4 sets of 2 granny squares stitched together in the 1 square x 2 squares configuration. Set 2 of the sets aside for now.
First side of pillowStep 3: Take 2 of the 1x2 sets and with wrong sides facing each other, stitch these together using the lacing sitch, along one long edge so you end up with a Two by Two configuration. Make sure all ends are woven in at this point before continuing.
Now you are going to work in the round.
RND 1: Join off white or scrap yarn onto any corner space. Work 2sc, ch2, 2sc in each of the 4 corners, ch1 over each seam and 1 sc in each stitch around. Join w/slst to first sc. Fasten off scrap yarn or off white yarn.
RND 2: Join black fleck or contrasting 2nd color in any of the outside corner spaces. (Ch3, 2dc, ch2, 3dc in same sp. Dc in each sc and in each ch1 space across to the next corner.) *3dc, ch2, 3dc in next ch2 corner sp. Rep bet () once. Rep from * around. Join w/slst to top of ch3.
RND 3: Ch3, dc in each of the next 2 dc. *3dc, ch2, 3dc in next ch2 corner sp. Dc in each dc across to next corner. Rep from * around. When you get back to where you started, you will have already done a ch3 and 2 dc before the next corner so end with joining w/slst to top of ch3. Fasten off and weave ends into back of work on the first side of the pillow only.
Second Side of pillow
Repeat up to RND 3 for first side of pillow but do not fasten off.
RND 4: Join front of pillow to back of pillow by working through both layers. Work 1 sc in each dc around and by working 3 sc in each of the ch2 corner spaces. Slip your pillow form into work before stitching up the 4th side. When you get back to where you started. Join w/slst to first sc.
Design written on Saturday, April 21, 2012. Copyright ©2012 By Julie A. Bolduc f119003
***Charlie weights only 6.5lbs and was born sometime in 2004. As of this date, February 11, 2015, he is still with us at the ripe old age of almost 11! He passed away in 2018. He was 14 years old. I miss him dearly. He was such a sweet kitty. He loved to be on my shoulders when I was walking around the house.

