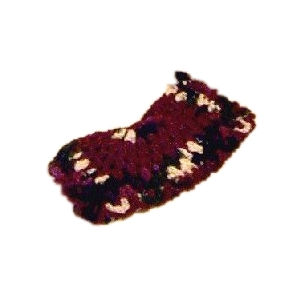
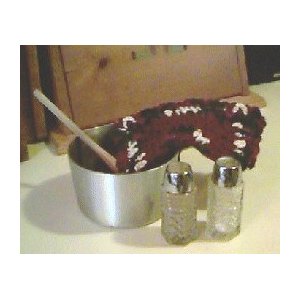
Granny Potholder
 Designed By Julie A. Bolduc
This potholder started out as a granny square that did not work so to prevent frogging, I continued on and made it bigger then folded it in half and created this potholder. See what can happen when you design patterns?
Materials Needed:
Small amounts each of 2 colors a solid and a variegated. Dawn Sayelle Yarns.
Colors of your choice. I used a burgundy and forest variegated color combination. Can't remember exactly what colors names they are.
Size H Aluminum Crochet hook
Yarn Needle
Gauge: =5sc=1"
Yarn Thickness: =3mm
Finished Size: =13"long at longest part. 5"wide
Skill Level: Easy

Instructions
With solid Color.
RND 1: Ch4, join w/slst to first ch to form ring. Ch3. Work 15dc in ring. Join w/slst to top of ch3. Fasten off solid.
RND 2: Join variegated in any sp bet 2dc. Work bet the stitches for this whole round. Ch3. dc in same sp. Ch1. (2dc in next sp, ch1, 3 times.) *Ch2. (2dc in next sp, ch1, 4 times.) Ch2. Rep from * around. Join w/slst to top of ch3. Fasten off variegated.
RND 3: Join solid in any ch2 sp. Ch3, dc ch1, 2dc, ch2, 2dc, ch1, 2dc in same sp. (Ch1, 2dc in next ch1 sp, 3times.) Ch1. *(2dc, ch1, 2dc, ch2, 2dc, ch1, 2dc in next ch2 sp.) Ch1. (Ch1, 2dc in next ch1 sp, 3times.) Ch1. Rep from * around. Join w/slst to top of ch3.
RND 4: Slst to the first ch1 sp. Ch3, dc in same sp. *2dc, ch2, 2dc in next ch2 sp. Ch1. 2dc in next ch1 sp, 6 times. Ch1. Rep from * 3 around. When you reach the beg, join w/slst to top of ch3.
RND 5: Slst to the first ch1 sp. Ch3, dc in same sp. *2dc, ch2, 2dc in next ch2 sp. Ch1. 2dc in next ch1 sp, 7 times. Ch1. Rep from * 3 around. When you reach the beg, join w/slst to top of ch3. Fasten off solid.
RND 6: Join Variegated in any ch2 corner sp. Ch3, dc, ch2, 2dc in same ch2 sp. *Ch1, 2dc in next ch1 sp 8 times. Ch1. 2dc, ch2, 2dc in next ch2 sp. Rep from * around. Ch1. Join w/slst to top of ch3.
RND 7: Slst to ch2 sp. Ch3, dc, ch2, 2dc in same sp. Ch1, 2dc in next ch2 sp 9 times. Ch1. *2dc, ch2, 2dc in next ch 2 sp. Ch1, 2dc in next ch2 sp 9 times. Ch1.Rep from * around. Join wslst to top of ch3. Fasten off Variegated. Weave all ends into work.
Finishing
This next section creates a woven effect to form an edging while closing the potholder.
Fold Square in half. Lay the folded rectangle in front of you so the folded side is toward you. Join variegated in the very first sts at the bottom right corner working through both thicknesses and through 4lps. Sc in these sts. Ch4, join w/slst to 4th ch from hook. Work 12sc in ring just made. (hanging lp) Then sc in back in starting st. *Ch 5, sk next st, sc in next st. Rep from * to the bottom left corner Work the foll in both corners sc, ch5, sc. Fasten off variegated color.
Join solid color in first sc skipped on the right hand side in front of the ch5 lp. Sc in this st. *Ch5. Sc in next st working in back of the next ch5 lp. Ch5. Sc in next sk st working in front of the next ch5 lp. Rep from * all the way across to the other side. Make sure each sc is between each of the variegated sc sts. Fasten off and weave ends into work.
NOTE: This is made from acrylic yarn, if you plan to use it for more than just decoration, please use cotton yarn instead to prevent melting and possible burns.
Designed on Thursday, September 17, 1998. Copyright © 1998-2023 by Julie A. Bolduc f102004

