Rosettes Tissue Box Cover

Designed by Julie A Bolduc
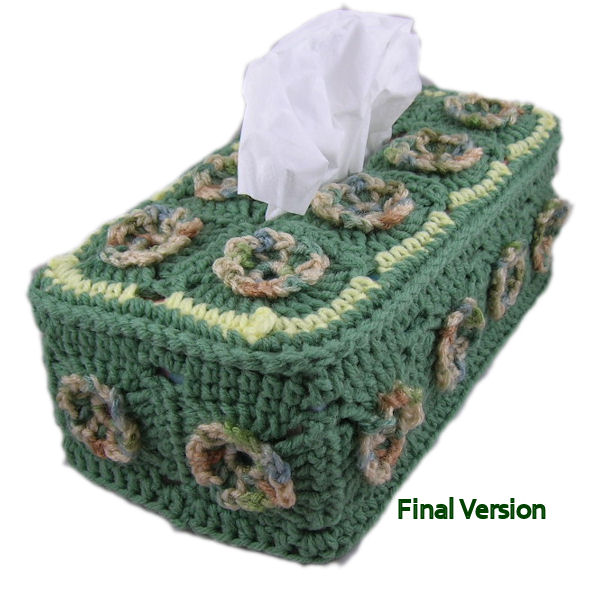
This tight fitting long tissue box cover starts off with making 20 squares of the same size. 8 of them are Stitched together to form the top and the other 12 are stitched together to form the sides. The top has 2 rounds of single crochet and the sides have a round of sc and half double crochet on each side. The top is stitched to the bottom with a different type of slip stitch technique that forms a small ridge along the top outside edge of the box. It is fun and fairly easy to make and can be completed in few evenings.
Materials Needed
Worsted weight acrylic yarn: Red Heart Super Saver Economy #0305 Aspen Print
Worsted weight acrylic yarn: Red Heart Super Saver Economy #0632 Medium Sage
Worsted weight acrylic yarn: Red Heart Super Saver Economy #0235 Lemon
Size H/8 or 6mm aluminum crochet hook
Yarn needle for weaving in ends and stitching pieces together
Yarn Thickness:4mm
Gauge: 4sc = 1"
Finished Size: 10in L x 5.5in W x 4in H
Skill Level: Intermediate
Instructions
Squares make 20 the same
RND 1: w/multi color, ch4, join w/slst to first ch to form ring. Ch1, 8sc in ring. Join w/slst to first sc.
RND 2: Ch1, sc in same st a slst. Ch3, sc in next sc 7 times. Ch2. Join w/slst to first sc. Fasten off and weave all ends into back of work.
RND 3: Join Medium Sage in any sc, of RND 1, behind ch3 sp. Ch3, 2dc in same st. 3dc in next sc, of RND 1, behind ch3 sp. Ch2. *3dc in next of the next 2 sc, of RND 1, behind ch3 sp. Ch2. Rep from * around. Join w/slst to top of ch3. Fasten off leaving a 12" end for stitching squares together. Weave the other end into the back of work.
Assemble Bottom
Lay 12 squares in front of you on your work surface so they are in a straight line. Make sure all of the ends are facing the same way. Lace stitch each square together to form this long straight line. Lace stitch the first square to the last square forming a large short tube. Weave all ends in.
RND 1: Join medium sage to the further most right dc of any square. Ch1, sc in same st. Sc in each of the next 5 dc. Ch2. *Sc in each of the next 6 dc, ch2. Rep from * around. Join w/slst to first sc.
RND 2: Ch1. Hdc in same st as slst and in each of the next 5 sc. 2hdc in next ch2 sp. *Hdc in each of the next 6 sc. 2hdc in next ch2 sp. Rep from * around. Join w/slst to first hdc. Fasten off medium sage. Repeat for other side of bottom. Fasten off and weave all ends into back of work. Set bottom aside for now.
Assemble Top
- Lay 8 squares on your work surface 4 on top and 4 on bottom to form a large rectangle. Make sure all of your ends are in the same corner on each square so they are going the same way.
- Lace stitch the top 4 squares together so they form a long rectangle that is 1 x 4 squares. Do the same for the other 4 squares.
- Lace stitch the end square of both strips together so they form a large rectangle that is 2 x 4 squares.
- Lace stitch the other end square so you end up with a 2 square long size opening in the top.
- Weave all ends into work
Lay rectangle in front of you so you have 1x4 squares on top and bottom.
RND 1: Join lemon to top right ch2 corner sp. Ch1, sc, ch2, sc in same sp. (Sc in each of the next 6 dc, ch2, three times. Sc in each of the next 6 dc. Sc, ch2, sc in next ch2 corner sp.) Sc in each of the next 6 dc. Ch2. Sc in each of the next 6 dc. Sc, ch2, sc in next ch2 corner sp. Rep bet () once. Sc in each of the next 6 dc. Ch2. Sc in each of the next 6 dc. Join w/slst to first sc. Fasten off lemon.
RND 2: Join medium sage to same st as slst. Sc in same st as slst. Sc in next sc. (2sc in next ch2 sp, sc in each of the next 6 sc, 3 times.) Sc in each of the next 2 sc. ((Sc in each of the next 6 sc. 2sc in next ch2 sp. Sc in each of the next 6 sc.)) 2Sc in next ch2 corner sp. Rep bet () once. Sc in each of the next 6 sc. 2sc in next ch2 corner sp. Rep bet (( )) once. Join w/slst to first sc. Do not fasten off.

Final Assembly
Stitch top to bottom with wrong sides facing each other. Line up the top to the bottom so that the corner 2 sc match up with 2 of the hdc that are in the ch2 space. Insert hook in front loop, from front to back, of the top piece and insert hook in back loop, from front to back, of corresponding hdc of bottom piece, yo, pull through both loops on hook. Do this for each stitch around. Join w/slst to first sl st. Fasten off and weave ends into back side of work.
NOTE: I used just a small scrap of lemon. About 1/2 skein of the Aspen and about 2/3 skein of the Medium Sage.
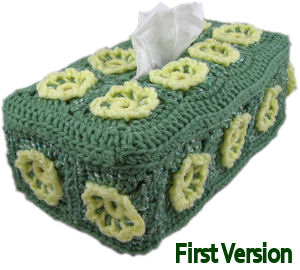
Here is the first model I made that had 11 squares around. I really do not like the way this one looks so I started over and made the one above. I had made 11 squares that had an extra round on them, then stitched them together. Everything was then whip stitched together which made the seams wider. The resulting cover was looser and did not fit right. Click image to see larger version.
Design written on Tuesday, July 26, 2011 Copyright ©2011 By Julie A. Bolduc p122013

