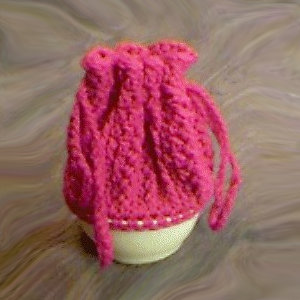
Child's Margarine Tub Purse
 Designed by Julie A. Bolduc
Yes you have seen this type of purse before but I feel there could be many different versions like granny squares and scrunchies. So here is my version. These have been made to put little dolls in but they can be used for any small toy. This will also make a great gift for a little girl in your family. You could fill it up with all sorts of goodies and put a bow on it and give it to her as is without wrapping it. The one in the picture is going to my 2 year old neice. I know she is going to love it.
Materials Needed:
1 oz margarine tub empty and clean. Top Diameter 4"
1 paper punch to make ¼" holes
Red Heart Worsted weight yarn in red or desired color.
Size H aluminum crochet hookYarn needle
Yarn Thickness4mm
Gauge: 7dc=2"
Finished Size: =6.5" high
Skill Level: Beginner
Special Stitch Used is the Front Post Double Crochet (fpd). Which can be found in the Featured Stitches Section.
Instructions
Margarine Tub preparation
Using paper punch. Punch 32 holes around rim. Just under the lip. You may want to punch 4 in first in a criss cross fashion then punch holes centered between each of these holes. Then again punch holes centered between holes again until you have 32 holes. You might want to mark the tub first with a permanent marker first then punch your holes.
Tie yarn onto two of the holes so that there is no yarn over the rim but woven through the holes. Work a surface chain stitch all the way around the rim going from one hole to the next. Here is how. Insert hook in first hole draw up a lp, *insert hook into next hole to the left, draw up a lp and draw this lp through the lp on the hook. Rep from * all the way around.
Now you will work on the rim.
RND 1: Ch1. Sc in each hole around. Join w/slst to ch1.
RND 2: Ch3, dc in same st as slst. 1dc in next sc. *2dc in next sc 1dc in next sc. Rep from * around. Join w/slst to top of ch3.
RND 3: Ch3. Dc in next dc. Fpd in next dc. *Dc in each of the next 2 dc. Fpd in next dc. Rep from * around. Join w/slst to top of ch3.
RND 4-8: Ch3. Dc in next dc. Fpd in next fpd. *Dc in each of the next 2 dc. Fpd in next fpd. Rep from * around. Join w/slst to top of ch3.
RND 9: Ch3. Dc in next dc. Ch1. *Sk the fpd. Dc in each of the next 2 dc. Ch1. Rep from * around. Join w/slst to top of ch3.
RND 10: Ch3. Dc in next dc. Dc in ch1 sp. *Dc in each of the next 2 dc. Dc in ch1 sp. Rep from * around. Join w/slst to top of ch3.
RND 11: Slst in each st around. Join w/slst to first slst. Fasten off and weave all ends into work.
TiesMake two. Ch60.
Weave the chains through the holes in round 9 each going the opposite way and then ends coming out on the opposite sides. Tie the ends together and weave the ends in. You should now be able to pull on the ties to close the purse.
Designed on Monday, November 9, 1998. Copyright © 1998-2013 By Julie A. Bolduc p113009

