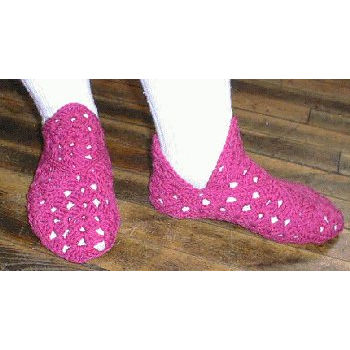
Granny Square Slippers
Rewritten & worded By Julie A. BolducThese slippers are very similar to the slippers my grandmother made for me when I was a child. These are made with basic granny squares. Read Note below.
Materials Needed:
3oz worsted weight yarn
Red Heart Super Saver, Art. E.301 Color: 375 Raspberry was used in the example
Size G aluminum crochet hook
Yarn needle
Yarn Thickness: 4mm
Gauge: Small square is 3" x 3"
Finished Size: Fits womans size 6-8 shoe size.
Skill Level: Easy
Note: You will need the Basic Granny Square pattern available on this site to make these slippers.
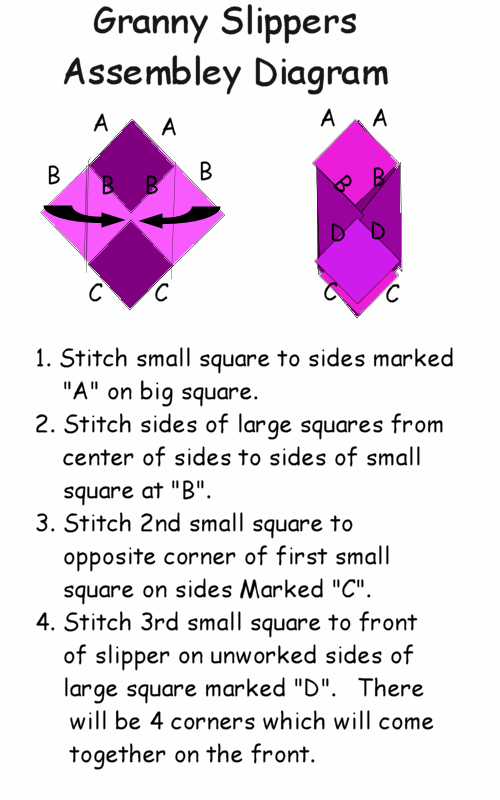
The diagram is not perfect on purpose to show the different layers of the squares.

You will need to make 3 small granny squares and 1 large one for each slipper.
Follow the Basic Granny Square pattern and make 6 rounds for the sole of the slipper and make 3 rounds for the small grannies.
Now place the large granny square down in front of you and fold the left and right corners to the center. See the empty square at the top and bottom? Well this is where the small grannies will go. Use one for the toe and the other two for the heel and upper foot.
Stitch the small grannies in place around the outer edges wrong sides together using an overcast stitch. If you use a varigated yarn for all the squares, the stitches may not even show. If you use a color scheme where you are using up scraps to make the slippers, then use the same color yarn as you did for the last round on all the squares. This way you will not see the stitches as easily.
Toe
Stitch all the way around the toe portion matching up the right corner of the large square to the bottom corner of the small square and work your way around the back to the bottom corner of the small square. This should match up all the way around.
Upper Foot Now to stitch the upper foot to the sole, start at the right corner of the small square and half way from the bottom corner of the sole. Stitch around half way to the left corner, then pick up the other small square and stitch from the heel's left corner around the bottom corners of both the heel and the sole to the right corner of the heel and to the halfway point of where you joined the upper foot. Fasten off and weave ends into work.
To make a finishing touch, tie yarn onto the left corner of the upper foot and working onthe outside, sc in each st around to give it a finised edge.
Note: I designed them from memory so they are not exactly like the one's my grandmother made for me. I am not intending to say they are all my own creation because they are not. That is why they are free. I have used my own words to write these instructions. I know they may look identical to others you may have seen but that is my point. I just wanted to make this pattern available to anyone who wanted this design. I do not know who the original designer for the concept of these slippers was but here is the way I put them together.
Written by Julie A. Bolduc Copyright 2007 © f124002

