Paper Bead Crafts PVC Paper Bead Drying Rack
Watch Video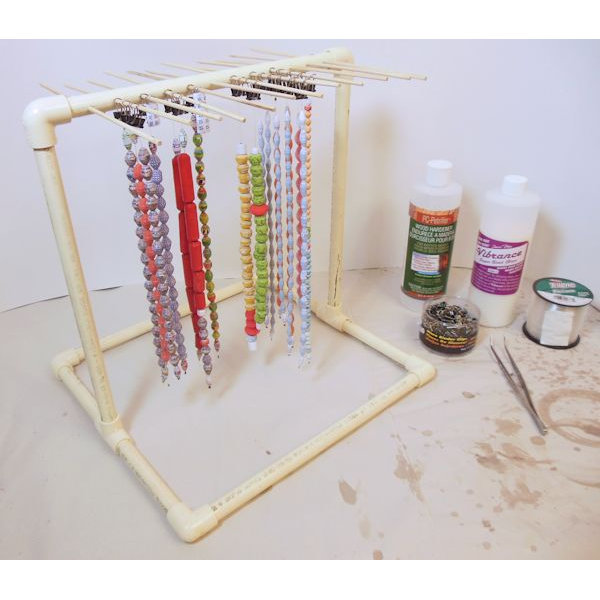
Designed By Julie A. Bolduc
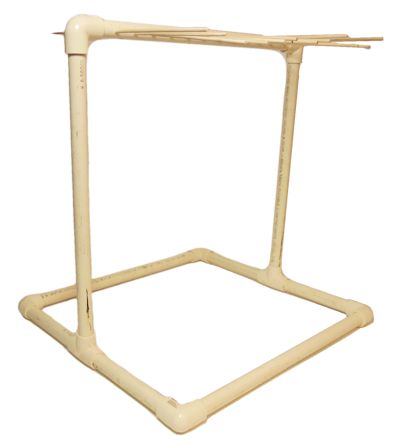
This drying rack is made from cPVC pipe and wooden dowels. It is meant to work with dipping paper beads strung on 50lb test monofiliment fishing line. It is fairly easy to make and will hold as many as 168 strands of beads based on 7 strands per pin. I was inspired to design this drying rack by Lisa at the Beyond Bracelets YouTube channel
- Materials Needed
- 2 pieces cpvc pipe 1/2" diam x 12" long.
- 3 pieces cpvc pipe 1/2" diam x 11-5/8" long
- 4 pieces cpvc pipe 1/2" diam x 5" long
- 6 1/2" cpvc elbow fittings
- 2 1/2" cpvc tee fittings
- 12 dowels, 12" x 1/8" or skewers
- Acetone based nail polish remover
- 1 package of 100 Mini or micro Binder Clips
- 50lb test monofiliment fishing line
- 2mm Crimp beads
- Tools Needed
- Miter Box and saw or a pipe cutter
- Black Sharp Permanent marker or pencil
- Electric Hand Drill or Drill Press with a centering jig
- 1/8" drill bit
- Paper Towels for cleaning markings off of pipe.
- Chain Nose Jewelry Pliers
Finished Size: 13-1/4" x 12-1/2" x 14"
Instructions
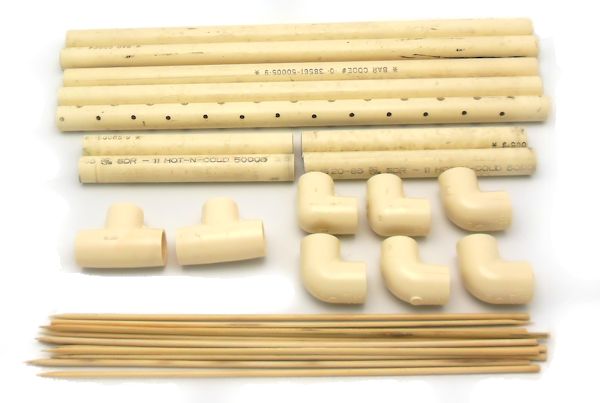 Step 1: Cut all of your pipes to the sizes and amounts above. Clean them with paper towel moistened with the nail polish remover. If you want to completely remove the writing on the pipes, you will need pure acetone. I only had nail polish remover with acetone in it and as you can see, it did not remove the lettering. If you have pure acetone, it will come off easier and more thoroughly. You can get pure acetone in the nail polish remover section of any major store. It is what is used to remove artificial nails!
Step 2: Take one of the 3 pieces of the same length, "11-5/8" x 1/2" and mark your holes 7/8" apart starting at 1" from one end. You should have 1" left at the other end. Make sure to make your marks as straight as possible. The way I marked it is I put the t fittings at each end and layed it flat on my work surface. Then I layed a ruler along the center seam of the tee fitting across to the other one at the other end and drew a line all the way across, I then marked my holes along this line 7/8" apart.
Step 3: Assembly: pick up 2 of the 5" pieces and connect them by sticking them into the 2 sides of one of the tee fittings. Repeat for the other 2 5" pieces and the other tee fitting. These are the sides that the 2 uprights will go into. Insert the other ends of each of the 5" pieces into an elbow fitting. So now you should have 2 sides with 2 elbows and a tee fitting on each one. Tip:If you want your drying rack to be taller, just make these 2 pipes longer. Such as 18" long. I would not dare to make the drying rack taller for fear of it being top heavy and tippy but you would be able to have longer strands with a taller drying rack. You can also make 2 sets to enable you to have 2 heights at your disposal. I made mine the shorter length because it is easier to dip the strands of bads in the containers I use.

Step 4: Finish the base by adding the 2 of the 3 11-5/8" long pieces into the open ends of the 4 elbows to form a rectangle/square shape. This is the front and back of the base of the rack.
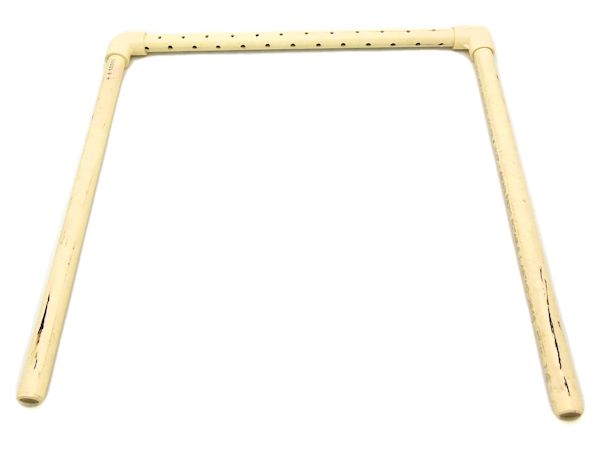
Step 5: Fit the last 2 elbows on the pipe with the holes. Make sure the holes are facing you and the open part of the elbows are facing the table. You might want to tap the fittings onto the pipes as you go to secure them. Do not glue anything together. You want to be able to take your drying rack apart for storage.
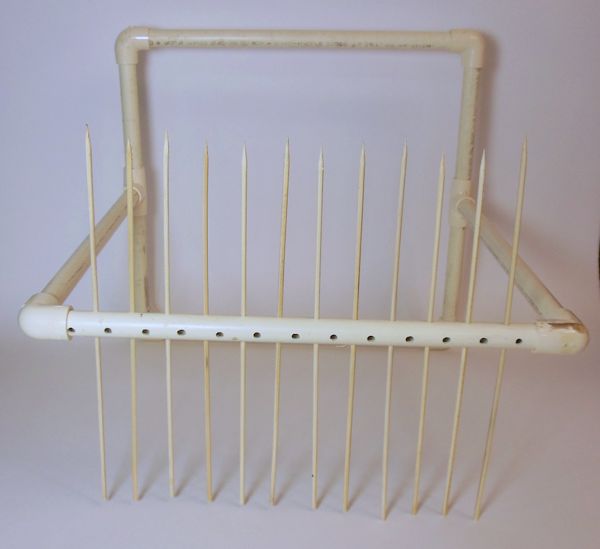
Step 6: Fit the pipe with the holes and elbows on the top of the 2 uprights. Tap them in place to secure.
Step 7: Insert dowels or skewers into each hole going through so the center of the dowel or skewer is inside the pipe. The should fit snug, not loose. You don't want them loose enough to work themselves out. You want them just tight enough so they will come out when you actually want to pull them out. You can use 1/8" diameter, 12" long wooden dowels if you want. I would slightly sharpen both ends to make it easier to insert them into the holes.
How to Use Your Drying Rack!
- Cut your 50lb test fishing line to 12" pieces
- Using your chain nose pliers, put a crimp bead at one end of a piece of fishing line and flatten it. This is stopper. Use a binder clip at this same end, string on your beads, starting and finishing with a waste bead. Put a crimp bead at the other end. The waste beads will take on the extra glaze that drips from the last good beads at each end.
- Holding both ends, dip your beads into your thin varnish or glaze.
- Shake the excess glaze off of the beads. I use a large empty box to shake more of the glaze off before hanging.
- Hang one end on the drying rack with the binder clip.
- When you dip them a second time, move the binder clip to the other end hang it so you invert your strand of beads for even coverage. (Tip:When getting ready to dip them the 2nd, 3rd, 4th and 5th times, remove all of the strands from the rack at the same time. Move all of the binder clips to the opposite end before you start to dip again. Also when you move the binder clips to the opposite nd, take the tim to break apart the beads that are stuck together and move them down to the crimp bead that is now at the bottom.)
- If you do multiple dips, do an even number of dips, inverting your strand each time for even coverage.
- What I use is 2-4 coats of PC Petrifier Wood hardener and 2 coats of Vibrance.
Design written on Saturday September 6, 2014. Copyright ©2014-2019 By Julie A. Bolduc
NOTE: cPVC is the yellowish pipe meant for hot and cold water plumbing lines.

