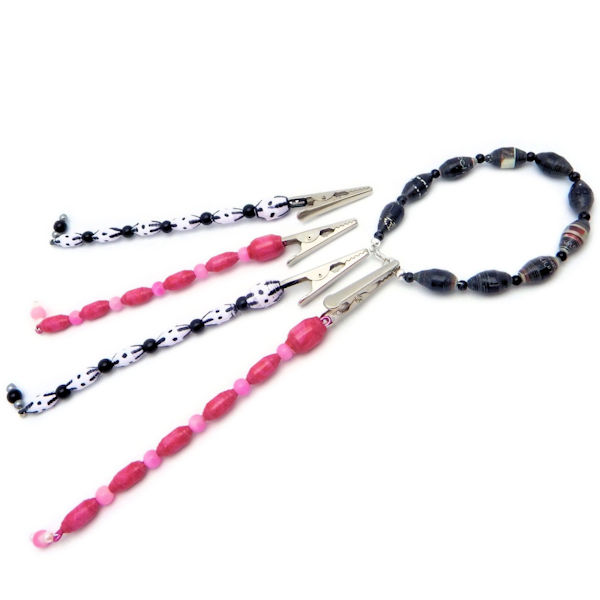
Paper Bead Bracelet Helper

Designed By Julie A. Bolduc
Having trouble putting on your bracelets? Make this Paper Bead Bracelet Helper with paper beads, some wire and an Alligator Clip! This bracelet helper is flexible so it can form to your hand and wrist to make it even easier to use!
- Materials NeededTo Make 2 just like those shown in the picture
- 2 Alligator Clips
- 1 sheet 8½" x 11" of Printed scrapbook paper
- 1 sheet of copy paper to print bead template - optional
- PDF File of the 5/8" x 1/4" x 11" Cutting Template - optional
- 12 beads that have a 5/64" or slightly bigger hole I used 6mm round beads
- 14" of 16 gauge wire in any color, you can use what ever color compliments your beads
- 2 Head Pins at least 1" long
- 4 round beads 4mm
- White Glue
- Paper Bead Glazing Supplies
- Paper Cutting Tools of choice
- Round Nose Pliers
- Wire Cutters
- Flat Nose Pliers
- A 5/64" paper bead roller
- A 3/16" paper bead roller
Finished Size: 6" long not including the Dangle
Skill Level: Beginner
Instructions
Making the Beads
Step 1: Print out the cutting template either on the back side of your scrapbook paper or onto a sheet of copy paper. Cut the strips out long the cutting lines.
If you prefer not to use the template, make your strips a trapezoid shape that is 5/8" at the wide end and 1/4" at the narrow end 11" long. 1 sheet of the scrapbook paper will make enough beads for 2 bracelet helpers so you can either make a 2nd one for a friend or make something else with the extra beads. If you print the cutting template on piece of copy paper and layer and cut it along with your scrapbook paper, you can use the strips to make 2 more bracelet helpers. Just decorate the paper, with sharpie markers, before or after rolling.
Step 2: Roll the beads. You are going to make 1 larger fat bead and 5 smaller beads per bracelet helper. To make the larger bead, use the 3/16" paper bead roller and roll 2 strips layered together at the same time. To make the rest of the beads, use the 5/64" paper bead roller and 1 strip of paper per bead.
Step 3: Glaze the beads as you normally would.
Assembling the Bracelet Helper
Step 1: Cut a 7" piece of wire with your wire cutters.
Step 2: With your needle nose pliers, bend one end 3/8" from the end to form a long U shaped loop. Make sure the end is touching the wire.
Step 3: Place the U shaped end inside the open end of the alligator clip between the prongs and with your flat nose pliers, bend the 2 side prongs over the wire to secure it into place.
Step 4: Put larger bead on your wire first making sure the end of the alligator clip with the wire in it goes into the large hole of the bead. This will cover up the end of the wire and give it a finished look.
Step 5: Add rest of beads in order of preference. If you want it to look the one in the picture, then the 6mm round bead is next followed by a smaller paper bead. Repeat this pattern until you end up with 5 smaller paper beads and a total of 5 round 6mm beads.
Step 6: With your needle nose pliers, make a very small simple loop at the end of the wire, trimming off any excess wire as needed.
Step 7: Make a dangle with a head pin and 3 beads. A 4mm, 6mm, 4mm round, in that order. Make a simple loop and attach it to the simple loop on the Bracelet helper.
Using Your Bracelet Helper
Place the receiving end of your bracelet in the jaws of the alligator clip. Wrap the bracelet around your wrist. With your free hand, open the clasp and place it on the receiving end of your bracelet. Remove the Bracelet Helper!
Project written on Sunday April 5, 2015. Copyright ©2015 By Julie A. Bolduc f206004

