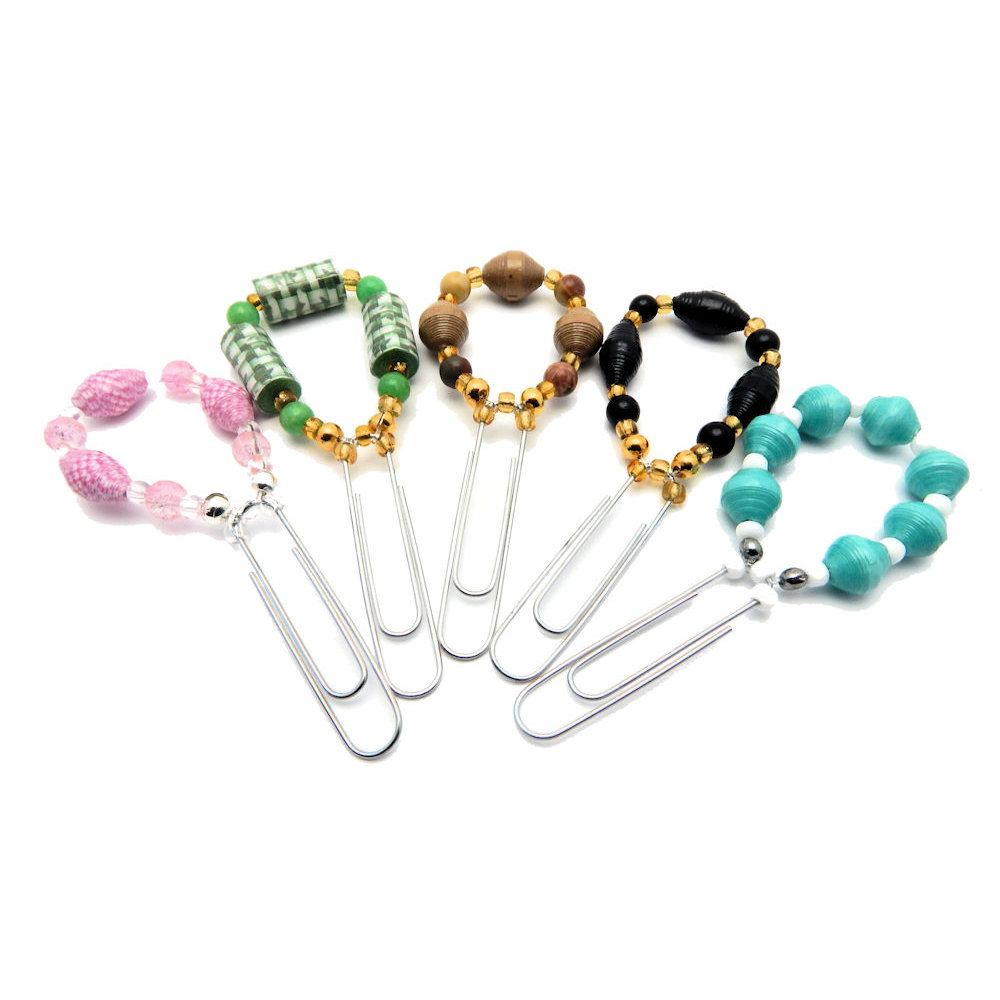
Paper Bead Bookmark or Chip Clip

Designed By Julie A. Bolduc
This bookmark is made with paper beads, other beads and a jumbo sized paper clip! You can use this either as a bookmark or a chip clip! To use it as a chip clip, just fold down the flattened top of an open bag of chips and slip this over the fold!
- Materials Needed to make one
- 1 Jumbo Regular Paper Clip
- 3 paper beads, 1/2" to 5/8" long, any thickness or shape, size 5/64" hole*
- 4 round beads, 6mm
- 11 Size 6/0 Seed Beads or E-Beads
- About 10" 50lb test Clear Fishing Line or 7strand size .45mm beading wire**
- 2 Crimp Beads, 2mm, any color
- 2 Crimp Bead Covers 4mm or 5mm, any color
- G-S Hypo Cement glue
- Tools Needed
- Pair of wire cutters or sharp scissors to cut fishing line
- Pair of Crimping Pliers
- A Scrap piece of paper or used card stock to use as a gluing surface
- A spring type clothespin for every bookmark you plan to make
Finished Size: Approximately 1.5" x 3.5"
Skill Level: Beginner
Instructions
Step 1: Gather up all of your materials and supplies.
Step 2: Add 3 size 6/0 seed beads to your paper clip and bring them to the small section of the clip. Set aside for now.
Step 3: Cut a 10" piece of fishing line from your roll. Add a crimp bead and add it to your paper clip between 2 of the beads and crimp into place making as small a loop around the clip as possible.
Step 4: String on all of the beads you are going to use on your bookmark onto the fishing line in the order that you want them to be in as long as it does not exceed 3.5" of beads.
Step 5: Add a crimp bead to the end. Using your crimping pliers, crimp the crimp bead to this end of the beaded section to the other side of the center bead on the paper clip. Trim the fishing line close to the crimp bead.
Step 6: Add the crimp bead covers to the crimp beads using your crimping pliers.
Step 7: Lay the bookmark on your gluing surface sideways. Pull the 2 seed beads away from your strands to make room for 2 dabs of your glue. Apply the glue to the paper clip on either side of the strands of fishing line. Bring the seed beads back to the strands over the glued spots to secure them in place.
Step 8: Use the clothespin to keep the beads in place while it dries. Allow to dry 24 hours before removing clothespin.
Note: *You can use any paper beads you already have as long as they are 1/2" to 5/8" in over all length and have a 5/64" hole. The hole size is important. You do not want the holes to be any smaller since they won't fit over the paper clip metal and you don't want the holes to be bigger or they will float around too much. I have not provided a template for these beads since you can actually use any size bead you really want. The over all length of the beaded section of the fishing line should be 3" to 3-1/2" and no longer. The materials I listed above is what I actually used in my bookmarks. I made 50 of them to give as thank you gifts for purchases made from my booth at the craft fairs I sell at.
Note About Beading Wire** I used the 50lb fishing line for all of my bookmarks because I liked how stiff it is. You can also use the 7 strand .45mm beading wire that can be found at Wal-Mart. It's not great wire for jewelry making but it would be great for this project since it doesn't need to drape well. It is stiffer than a better quality beading wire. You really do want the thickness that the 50lb test fishing line or the .45 beading wire gives you.
Design written on Thursday, September 24, 2015. Copyright ©2015 By Julie A. Bolduc f206008

