Easy Shopping Bag

Designed by Julie A Bolduc
This shopping bag is fun and easy to make and uses a technique called the burrito roll or magic seam in it's construction. It is made to resemble those plastic shopping bags that you get at most stores across the country that is now being banned in 8 states, around the country, including Maine, the state where I live. The way this one is made also has a pocket on one side meant to fold the bag into it's own little pouch. Sort of like a pillowghan or quillow. There are other bag patterns out there similar to this one but this is how I make mine.
- Materials Needed
- 1 Yard of 44" wide fabric total. Cut into 2 half yard cuts. You can use 4 fat quarters as well. 2 each of 2 prints.
- Sewing Thread to match color. Use cotton or Polyester, 50wt preferred.
- Tools Needed
- Cutting tools such as scissors or rotary cutter, ruler and mat.
- Free Template, provided in PDF file.
- Non permanent marking thing*.
- Tape Measure
- Quilting Pins and clips
- Sewing Machine
- Iron and Ironing Board
Note: I used 2 different fabrics that were actually half yard cuts. That way I did not have to sew a seam along the 18" edge to make them 44" long since they were already long enough. The fabrics were actually about 19" wide so slightly more than a half yard. Also one piece was actually bigger than the normal 44" to 45" wide so I just worked with what I had.
Instructions
Step 1: The provided template is just the top part of the bag where the handles are. You are to extend your fabric cuts down to the edge of your fabric from the longest edge of the template as shown in the photo. Print out your template onto cardstock so you can trace around it. If you plan to use it to make alot of bags, you might want to laminate it with a thermal laminator or the laminating sheets that don't need a laminator. Cut out the template along the solid lines.
Step 2: For Half Yard Cuts or Yardage: Work with 1 piece at a time. Your 2 pieces of fabric should be at least 18" wide by 44" long. Slightly bigger would be better for trimming up for accuracy. Fold one piece of your folded fabric in half so you have a 9ish inch wide by 22ish inch wide fabric in front of you with the long fold closer to you and the short fold on the right. You can reverse all of this if you are left handed.
For Fat Quarters: If you are using fat quarters, sew a 1/4" seam, with right sides facing each other along the 18" ends along where the fold would be, opposite where the selvages would be. Press the seam to set the seam.
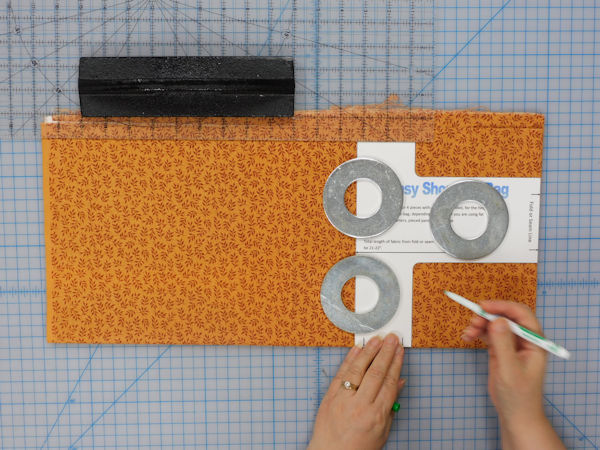
Step 3: Place the prepared template on your folded fabric as shown so the top fold is along the fold or top fold of the fabric and the side edge is placed along the fold. At this point, I am just working on tracing the template onto the fabric, marking where to cut the fabric. Do not trace along the longest line. Just the sides and top. As you can see in the photo, my fabric was wider than needed. Those silver round things you see, and the large black thing are weights. I used them to keep the template in place while I traced the template onto the fabric. *Use a marking thing that is not permanent. I used a Crayola Washable marker to mark my seams where ever my cut lines are going to be. The marks will wash out but they will also be cut away for the most part. The image shows what the marks should look like when you are done marking the fabric. To continue the marks beyond the template, I used a quilting ruler as my template and made sure I was 9" away from the folded edge all the way down.
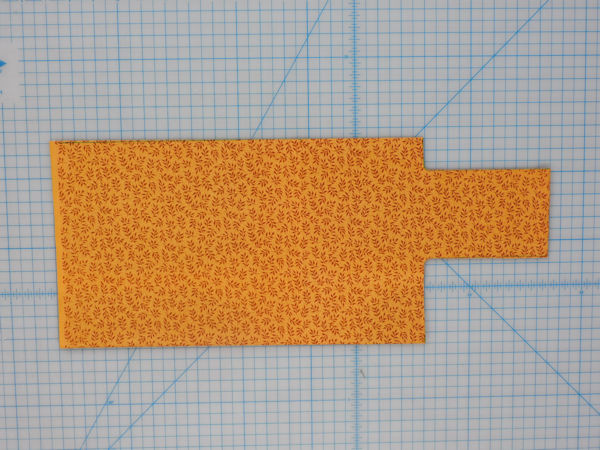
Step 4: Cut your fabric along the marks making sure not to cut the folds. I used fabric scissors for the top part and my ruler and rotary cutter for the long part.
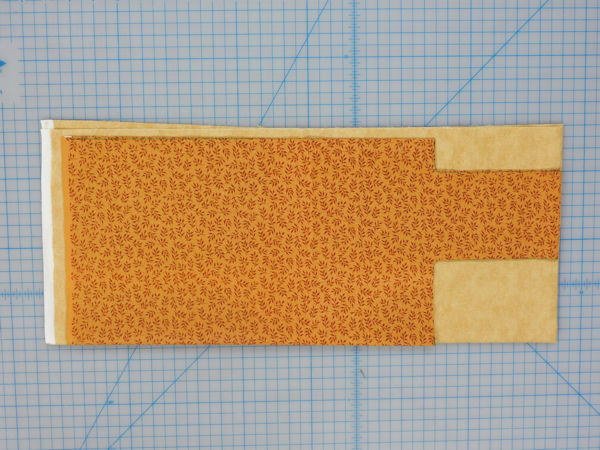
Step 5: Fold and lay the lining piece of your bag the same way you did the first one and lay it on your table also in the same way. Lay your cut piece on top of it lining up the folds and edges as carefully as possible. Cut the lining fabric along the cuts of the first fabrics. Use a rotary cutter and ruler for the long straight cuts.
Making the Bag's Neck
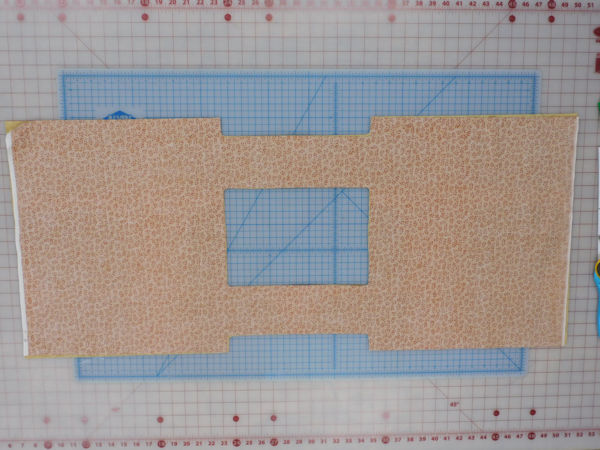
Step 6: Open both pieces, all the way, and lay your main fabric face up on your table then lay your lining on top of the main piece right sides facing each other. Line them up carefully.
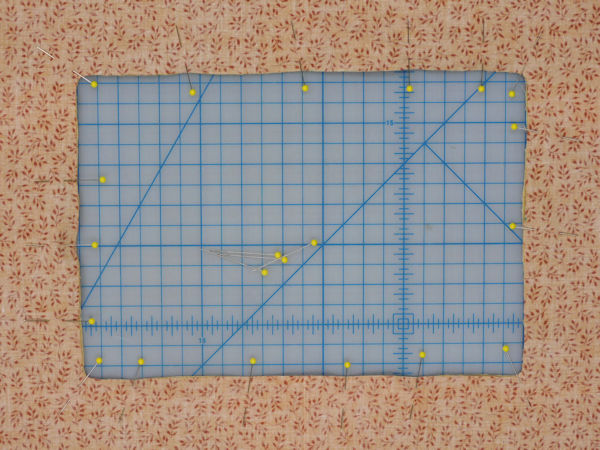
Step 7: Pin all around the opening to get the neck area ready to stitch. Use a 1/4" seam allowance and stitch where you pinned all the way around the neck opening. Then snip each of the corners close to the stitches.
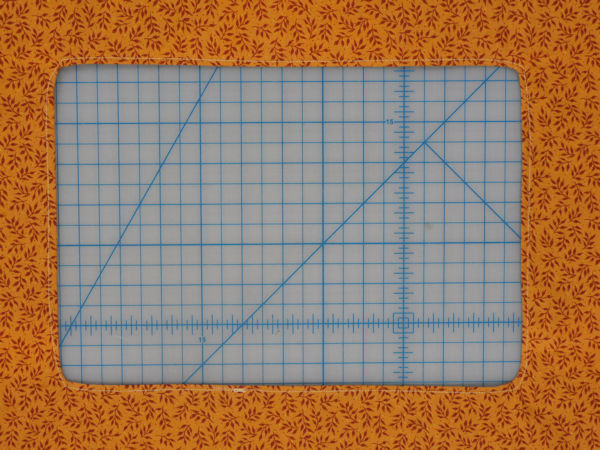
Step 8: Turn piece inside out and press the seams flat. Top stitch about 1/8" in from the edge of the seam.
Doing the Burrito Roll
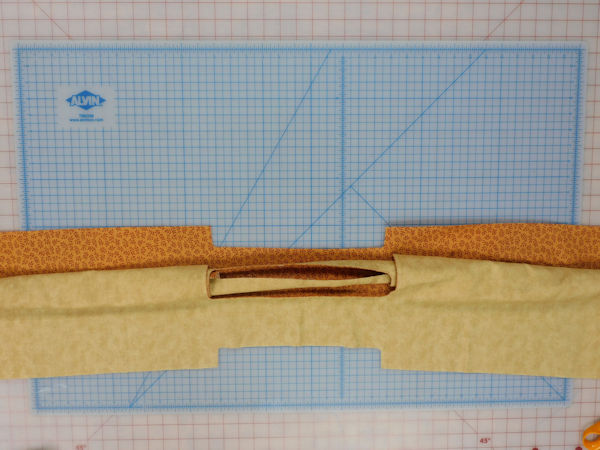
Step 9: Now you are going to do the burrito roll to get the edges pinned together to stitch the handles and sides together to get ready for the french seams later on. First off, lay the whole thing on the table infront of you, so the outside of your bag is facing up. Lay it out flat, roll up the bottom edge to the top as shown. Now take the back layer and bring it around to the front and match the edges and pin them together. Stitch the raw edges together from one end to the other as shown.
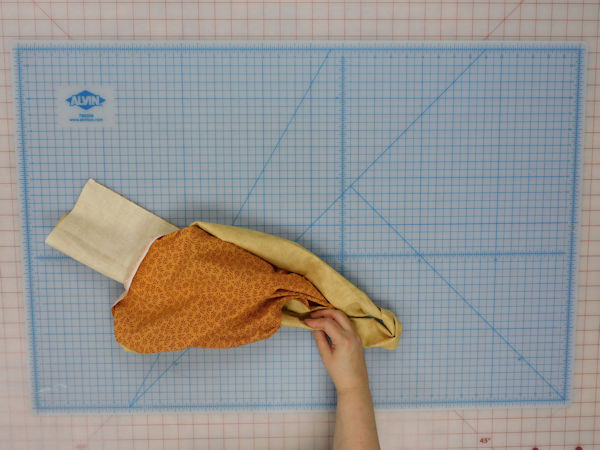
Step 10: Pull the inside out, straight everything out then repeat for the other side. Clip inside and outside corners before turning inside out. Give every seam a good press, rolling the seams between your fingers as needed to get all of the fabric where it needs to be.
Adding the Pocket
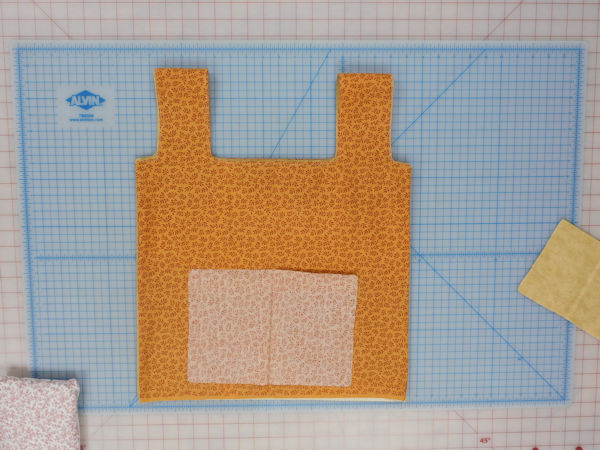
Step 11: Preparing Pocket. Take the main color piece from where you cut it out of the neck area, press it and fold it in half with right sides facing each other and stitch along the sides with a 1/4" seam allowance. Leave the bottom edge un-stitched. Clip corners, turn right side out and press flat. Mark the bottom center of the pocket for the next step.
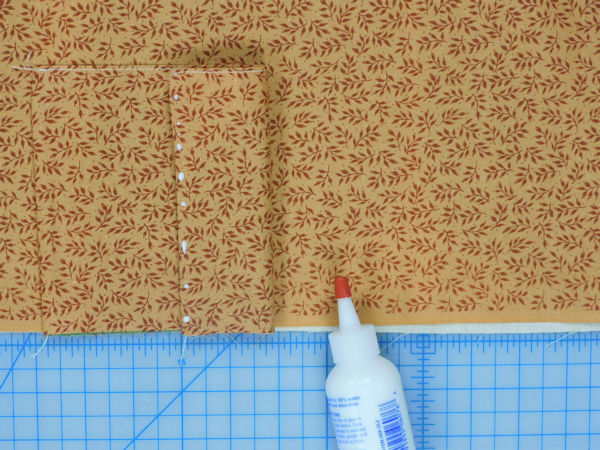
Step 12: Lay the pocket on the center of the bottom edge of one side of the bag, marking the center marks. I didn't do it in the photo but make sure the bottom edge of the pocket is no more than a 1/4" up from the bottom edge of the bag. You will be doing a French seam so you will loose a total of a half inch of your pocket if you line it directly on the bottom edge. Apply glue dots along the left and right edge of your pocket and press down onto the bag.
Step 13: Stitch the pocket to the bag along the left and right edge of the pocket. No need to stitch across the bottom. That will get caught in the French seam later. Double tack the top edges of the pocket while stitching to strengthen the seam.
Stitching the Sides
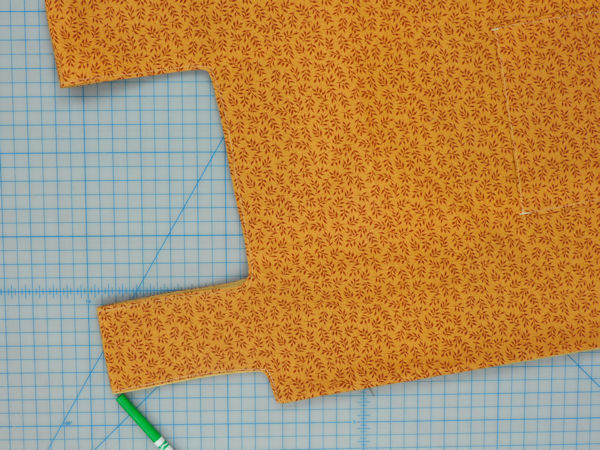
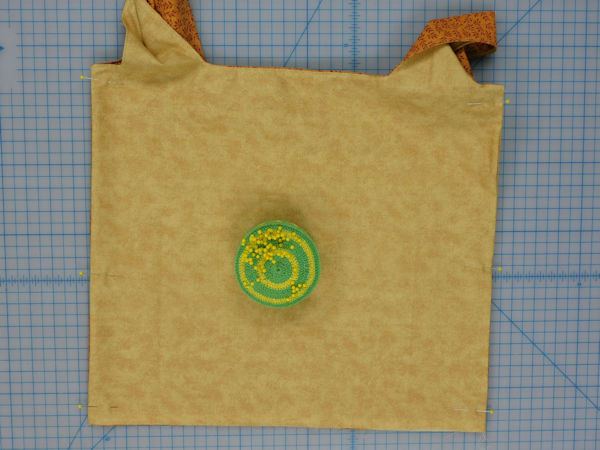
Step 14: Fold the bag in half so the handles are aligned.
Step 15: Fold your bag so the side edges meet and the lining is facing out. Pin the Sides together and stitch down each side using a 3/16" seam allowance. Press the seams and turn the bag inside out so the main fabric is on the outside.
Step 16: To make gussets on both sides of the bag, let the internal fold at the handles dictate how deep to make your internal folds. Make sure they are even all the way down. Secure with clips on the bottom and near the bottom on the sides. Stitch along the bottom edge using a 1/4" seam allowance. Trim the bottom to just over an 1/8" of an inch, keeping the stitches intact.
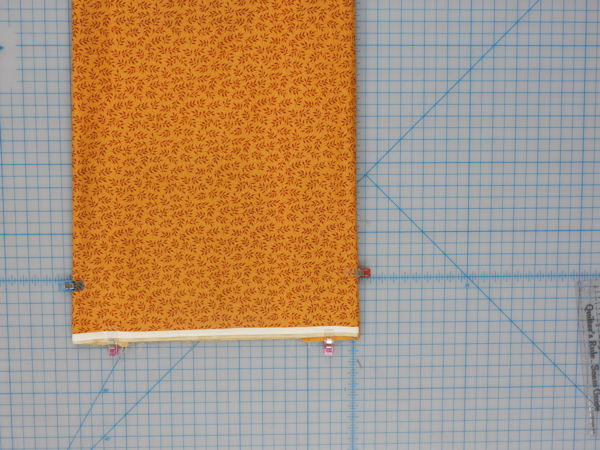
Making the Gussets
Step 17: Turn bag inside out, work the bottom so it looks like the images above. Flatten it and run a stitch across the bottom using a 1/4" seam allowance. Back Tack on the ends.
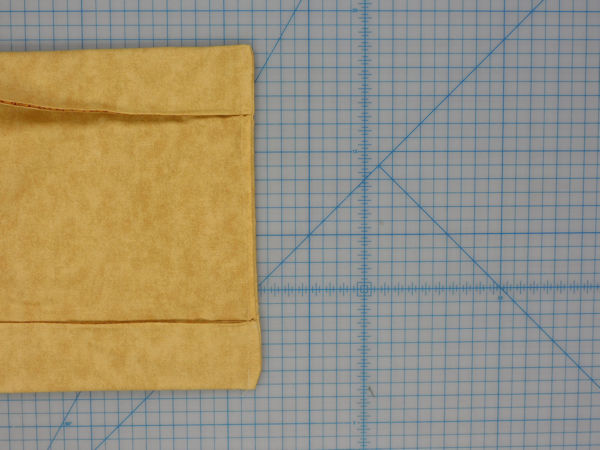
The French Seam
Step 18: Turn the bag inside out, work as needed so it looks like the image above. Flatten it and run a stitch across the bottom using a 1/4" seam allance. Back tack on the ends.
How to Fold your Bag
Step 19: Turn the bag right side out and press as needed. Your bag is done! Now learn how to fold it into it’s pocket so you can store it in a small space!
Step 19-1: Place the bag pocket side down on the table in front of you.
Step 19-2: Let the handles dictate how far in you are going to tuck in the side seams to form your gusset. Press it flat and place plastic clips or pins on the bottom and near the bottom on the side to keep them in place.
Step 19-3: Repeat for other Side.
Step 19-4: Fold the handles toward the pocket. Twice.
Step 19-5: Finally, turn the pocket inside out from the back to the front and tuck the rest of the bag into the pocket.
You can watch the video on how to fold this shopping bag. Once you know, it is easy!
Notes about this Pattern: I cannot take 100% credit for coming up with this shopping bag style. I took inspiration from a video on YouTube that only had music and was hard to follow. I was looking for instructions on how to make a bag like those plastic bags you get when you go shopping in any large store. In Maine, those are now banned and reusable bags are encouraged since we are being charged 5 cents per paper bag used at the check out line. I changed some of the aspects of the bag and made it work with fat quarters but it is easier to make with 2 half yard cuts of fabric. It takes 2 less seams. You can also piece your panels if you like.
Design written on October 6, 2021 by Julie A Bolduc of Just Plain Fun f404001

