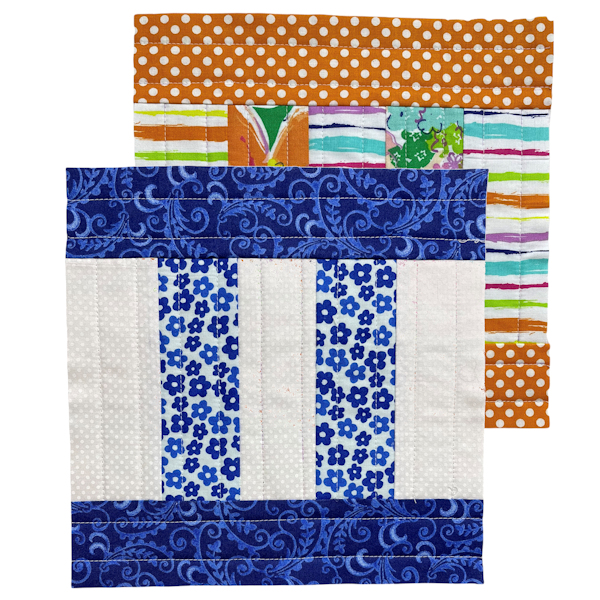
Bordered Stripes Block

Using the Kouché Method formerly the Quilt as You Piece Method
This is the 5th quilt block tutorial in a series on how to make quilt blocks using the Kouché Method formerly the Quilt as You Piece Method. This tutorial is not about making a quilt, it is about making the "Quilt as You Piece" block that you can add to the type of quilt where the blocks are joined after they are made, quilted then joined to other blocks. Like a Quilt as You Go Quilt. The size of the block I am making for this tutorial is a 10" x 10" block. The measurements for the cut size can be rounded up to the next 1/8" to allow for variances while you work.
Materials NeededFor each block, you will need: Add up to an inch of length for each piece of batting and fabric to allow for shifting and trimming up as you go.
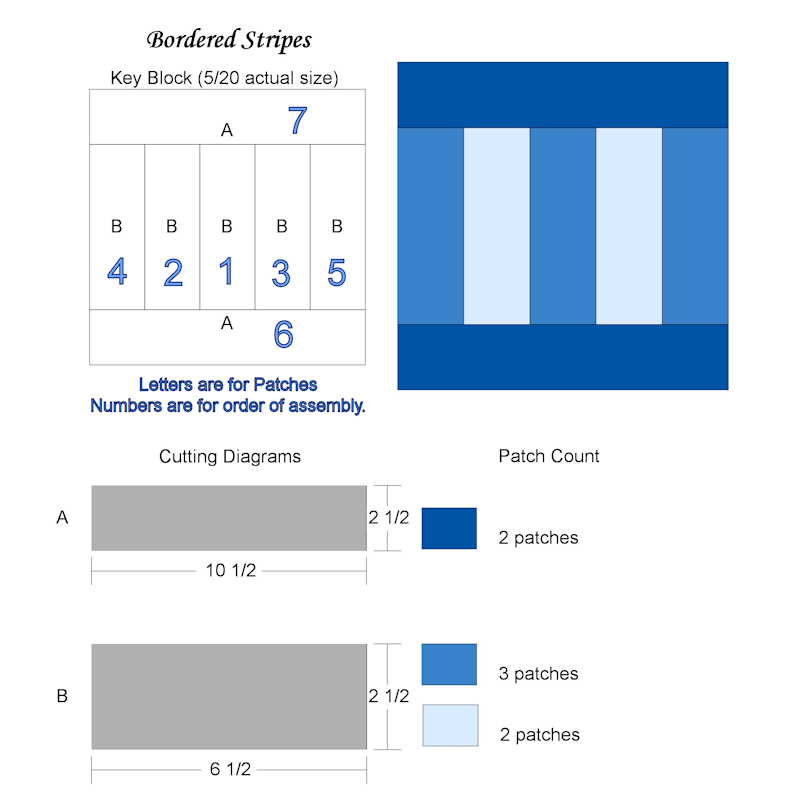
- 4 Pieces Fabric, 2.5" x 6.5" 2 each of 2 prints.Piece B
- 6 Pieces Fabric, 2.5" x 6.5" 3 each of 2 prints. Piece B
- 4 Pieces Fabric, 2.5" x 10.5" 2 each of 2 prints. Piece A
- 1 Piece Cotton Batting, 2.5" x 6.5" Piece B
- 4 Piece Cotton Batting, 2.25" x 6.5" Piece B
- 2 Pieces Cotton Batting, 2.25" x 10.5" Piece A
- Cotton Sewing thread in neutral color, 50wt preferred.
- Washable Liquid Glue
- Washable Glue Stick
These are the tools I used. Use what you have.
- Rotary Cutter & Cutting Mat
- Pair of Fabric Scissors
- Temporary Marking Device
- 18"x3" quilt ruler
- 10.5"x10.5" Square Ruler
- Dry Iron & Pressing Board
This pattern sheet just provides what materials you need and what size pieces you need to make a 10" block and in what order to sew the pieces of the block together. It does not go into detail how I put them together in the Quilt as You Piece manner, please refer to our tutorial of the Five Strip Rail Fence Block for the basic concept and instructions on how to do Quilt as You Piece for this block and all other blocks in this series.
Ignore the colors of the block on this page and the order they are in. Just use what you want, in the order you want. The block on this page is only a guide for how it is put together.
I am using all 2½" strips for my block since that is the easiest to use. I am also using a roll of 2.5" and 2.25" cotton batting. You can use scraps of batting you have or cut from a large piece of batting the sizes you will need. One thing to keep in mind. All of the batting scraps you use, have to be of the same content, loft and same brand. I recommend cutting your batting pieces about 1/2" to 1" longer than you actually need to allow for shifting while stitching. You can trim it down to size later.
Your batting and fabric strips can be longer than they need to be but since this technique includes the use of adhesives, and I am using 2.5" fabric strips, I have to make sure I work as accurately as I can.
The Process
First of all, before you start sewing, cut all of your pieces out. Follow the diagram for measurements. When I am making this block and other Quilt as You Piece Blocks, I always start with strips longer than I need them to be so I can trim them down after each section I complete and at the end. So make sure to add an up to an inch to the length of your pieces of fabric and batting to ensure accurate measurements at the very end when it is time to trim your block down to 10.5".
Follow the numbering Chart and the layering methods explained in the Five Strip Rail Fence Block to put this block together. You can also see how this block is put together by watching our Video.


