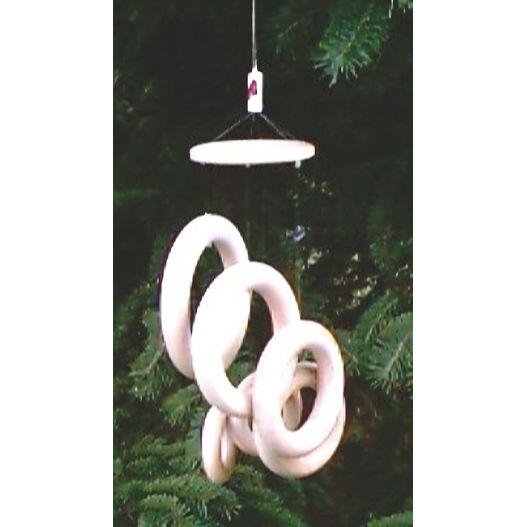
Wooden Rings Windchimes
Designed by Julie A. Bolduc
These windchimes are made with 7 wooden Birch rings and it is not hard to make. I think the hardest part is working with the nylon threads. This is my first attempt at creating a windchime. I hope you like it. I know you may have seen some like this before but perhaps the technique is different.
- Materials Needed
- 1 wood ring 1.5" diameter 3/8" thick
- 1 wood ring 1¾" diameter 3/8" thick
- 1 wood ring 2" diameter 3/8" thick
- 1 wood ring 2.25" diameter .5" thick
- 1 wood ring 2.5" diameter .5" thick
- 1 wood ring 3" diameter .5" thick
- 1 flat wood ring 2.5" diameter
- A drill with a 1/32" drill bit.
- Emery Board
- 13 clear seed beads
- 1 odd bead of choice. A paper bead with a butterfly on it was used in the example and comes in the kit.
- Nylon sewing thread or fishing line About 10 yds
- Model Glue
Instructions
STEP 1: Using the drill, drill a hole in each wooden round ring anywhere on the side going from the side to the center.
STEP 2: Use a protractor if needed to place 6 dots evenly around the flat wood ring. Drill a hole where each mark is. Smooth down all holes with the emery board. Set aside the rings for now.
STEP 3: Cut thread into 6 pieces about 1 yard long. That way you will have plenty to work with.
STEP 4: Tie a seed bead on one end of each thread and put a dab of glue on each one to seal it in. Do not cut the tail. You will be hiding the tail later.
STEP 5: String one wood ring on each thread running the thread from the inside of the ring to the outside. Put a dab of clue on the bead and bring up to the hole. Set aside to dry.
STEP 6: Tie a seed bead to each thread so that the bead is a certain distance away from the ring. Secure each bead with a knot and a dab of glue. In this order.
3" ring. 1" away from ring.
2.5" ring. 2" away from ring.
2.25" ring. 3" away from ring.
2" ring. 4" away from ring.
1¾" ring. 4.5" away from ring.
.5" ring. 5" away from ring.
These beads will hold the flat ring in place at the top.
STEP 7: Thread each string through flat ring from bottom flat edge to the top. Place a dab of glue on each bead and pull snug to the wood to glue the bead to the wood. Allow each one to dry before going onto the next string.
STEP 8: Bring up all 6 threads and tie together. This is tricky. Take your time. Get some coffee. Relax! hehe Tie all of them together a few times tightly.
STEP 9: Put a dab of glue on the knots. Then string on your single decorative bead, then string on a single seed bead and glue in place.
STEP 10: Then about 2" from the beads, tie in a knot again. Then another 2" up from there and tie another knot. Put a dab of glue on both knots. When the glue is dry, then trim the top even about .5" from the top knot. You may want to cover this knot with a bead of your choice. Just besure to glue it in place.
Use the 2" between the knots to hang your windchime. Split them into half so you have 3 strands on each side.
Design written on Sunday, July 25, 1999. Copyright ©1999 By Julie A. Bolduc f126001

