
Simple Lunch Bag
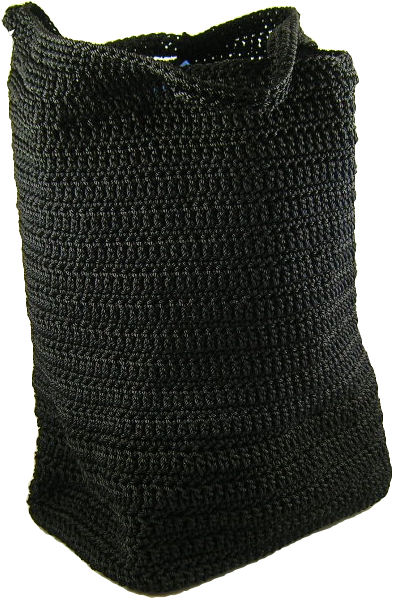
Designed by Julie A Bolduc
This simple lunch bag is just the right size for an adult lunch. It can also fit a water bottle. I designed it with my use in mind. I am able to fit a water bottle, a healthy frozen dinner, piece of fruit, small bag of chips and more!
Materials Needed
450 yds J&P Coats Crochet Nylon in Black
2 pieces 5" x 11" black rip stop nylon in black
1 piece 27" x 7.75" black rip stop nylon in black
Black sewing thread
Sewing machine
Piece plastic 4.75" x 7.5" for bottom support
Size G/6 4.00 Aluminum crochet hook
Tapestry needle for weaving in ends
Yarn Thickness: 4mm
Gauge: 4dc=1"
Finished Size: 5" w x 8" L x 12" h
Skill Level: Intermediate
Instructions
Bottom
ROW 1: Ch27. Sc in 2nd ch from hook and in each ch across. Ch1, turn.
ROW 2-18: Sc in each sc across, ch1, turn.
Now you will work in the round. Work a round of sc around in the following way.
RND 1: Ch1. Sc in each of the 18 rows down left side. Ch2 to turn the corner. Sc in each of the 26 sts across the bottom. Ch2 to turn the corner. Sc in each of the 18 rows up the right side. Ch2 to turn the corner. Sc in each of the 26 sc across the top. Ch2. Join w/slst to first sc.
RND 2: Ch1. Sc in same st as slst. Sc in each of the next 17 sc. 2sc in next ch2 corner sp. Sc in each of the next 26 sc. 2 sc in next ch2 corner sp. Sc in each of the next 18 sc. 2sc in next ch2 corner sp. Sc in each of the next 26 sc. 2sc in last ch2 corner sp. Join w/slst to first sc. (96sc)
RND 3: Sc in same st as slst and in each of the next 17 sc. 2sc in each of the next 2 sc. Sc in each of the next 26 sc. 2sc in each of the next 2 sc. Sc in each of the next 18 sc. 2sc in each of the next 2 sc. Sc in each of the next 26 sc. 2sc in each of the next 2 sc. Join w/slst to first sc. (104sc)
RND 4: Ch1. Working around the back post of each st, sc in each st around. Join w/slst to ch1.
RND 5: Ch2, dc in same st as slst and in each sc around. Join w/slst to first dc.
RND 6: Ch1, sc in same st as slst and each dc around. Join w/slst to first sc.
RND 7-37: Repeat RNDs 5&6 consecutively.
RND 38: Ch2, dc in same st as slst. Dc in each of the next 21 sc. Ch26. Sk next 26 sc. Dc in each of the next 26 sc. Ch26. Sk next 26 sc. Dc in each of the next 4 sc. Join w/slst to first dc.
RND 39: Ch1, sc in same st as slst. Sc in each of the next 21 dc. Sc in each of the next 26 chs. Sc in each of the next 26 dc. Sc in each of the next 26 chs. Sc in each of the next 4 sc. Join w/slst to first sc.
RND 40: Ch1, sc in same st as slst. Sc in each of the next 21 sc. Dc in each of the next 26 sc. Sc in each of the next 26 sc. Dc in each of the next 26 sc. Sc in each of the next 4 sc. Join w/slst to first sc.
RND 41: Ch1, sc in same st as slst and in each st around. Join w/slst to first sc. Fasten off and weave ends into back of work.
Inside Nylon Fabric Lining
With right sides facing each other and with a .25" seam allowance, sew the inside lining together. Sew the small pieces to each long side of the large piece to form a squared off bottom fabric box. Hem the top .25" down to the wrong side of the bag.
Tuck the fabric bag inside the crochet bag. With the black sewing thread, hand baste the top of the lining to the top of the crocheted back on the inside. Don't worry about the black thread showing. You can catch the inside threads of the black cord in each stitch to hide the stitches.
Design written on Tuesday, August 30, 2011. Copyright ©2011 By Julie A. Bolduc p125032
All items in our online shop ship free within the US only. I currently offer U.S. shipping only and it is from rural Maine. Delivery can vary from 2–14 days depending on your distance from Maine. Expedited shipping is not available.
Please note: I am now selling all of my paper bead making tools and other items from this web site using Paypal payments.
I have removed all of my paper bead making tools from Amazon. My Kindle crochet pattern books and paper template paperback books continue to be available on Amazon, as they are printed and fulfilled directly by Amazon. If you would like to shop my Etsy Store, follow the link in the header above.
Random Quick Tip!
Old Sock, New Hack!Cut a sock at about 4 Inches from the top, hem the raw edge and use the new hemmed stretchy tube for a cup cozy!