Grand Angel Wall Hanging

Designed By Julie A. Bolduc
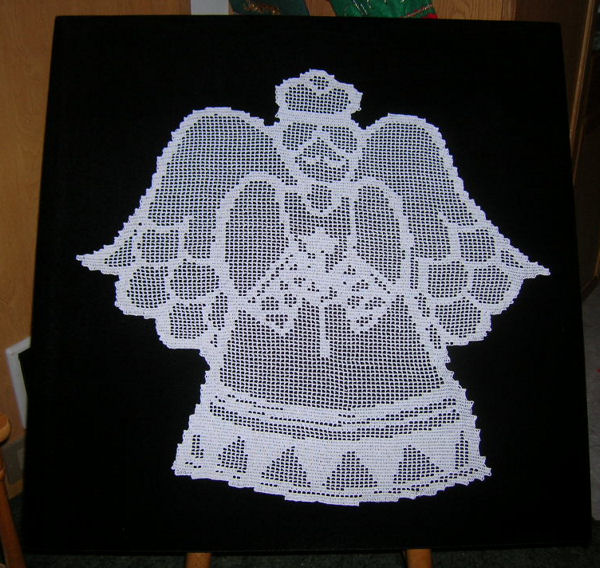
This large angel doily is perfect for a wall Hanging. I mounted it on a Stretcher frame made with pine pieces of wood, 30" long and ¾"x 1" wide. The final measurement of the angel itself is 26"x26".
Materials Needed
Size 20 cotton crochet thread
Size 11 steel crochet Hook
Niagra Spray Starch
1 yard piece pressing cloth
Ironing board & iron
4 pieces pine 30" long by ¾"x1"
1 yard black velvet
1 yard woven white medium weight cotton fabric
Light weight staple gun with 3/8" staples
4 flat angle brackets with screws, 2½"
Yarn Thickness: 20thread
Gauge: 10sc=1"
Finished Size: 26"x26", crochet alone
Skill Level: Advanced
Instructions
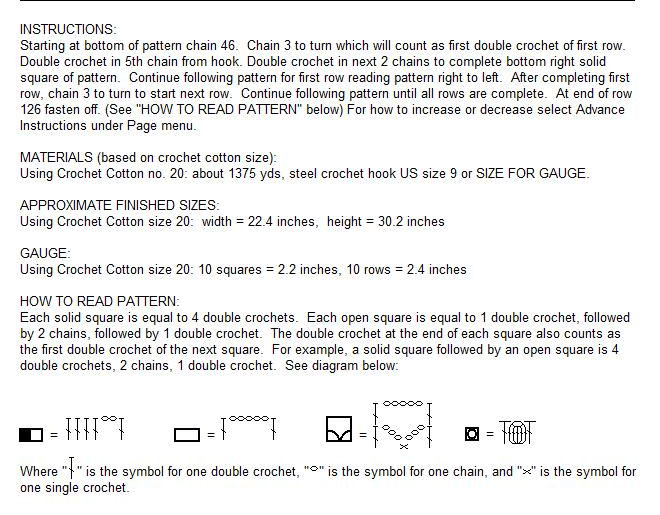
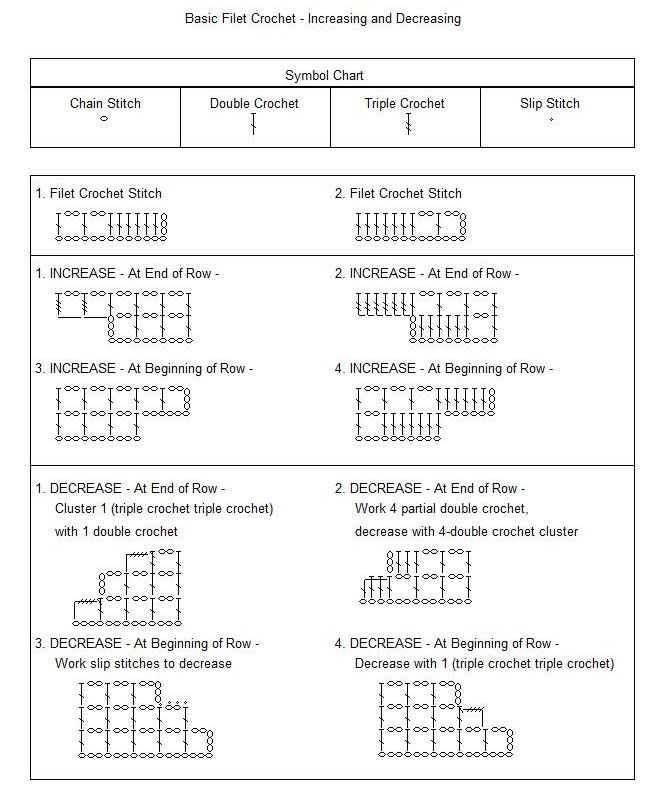
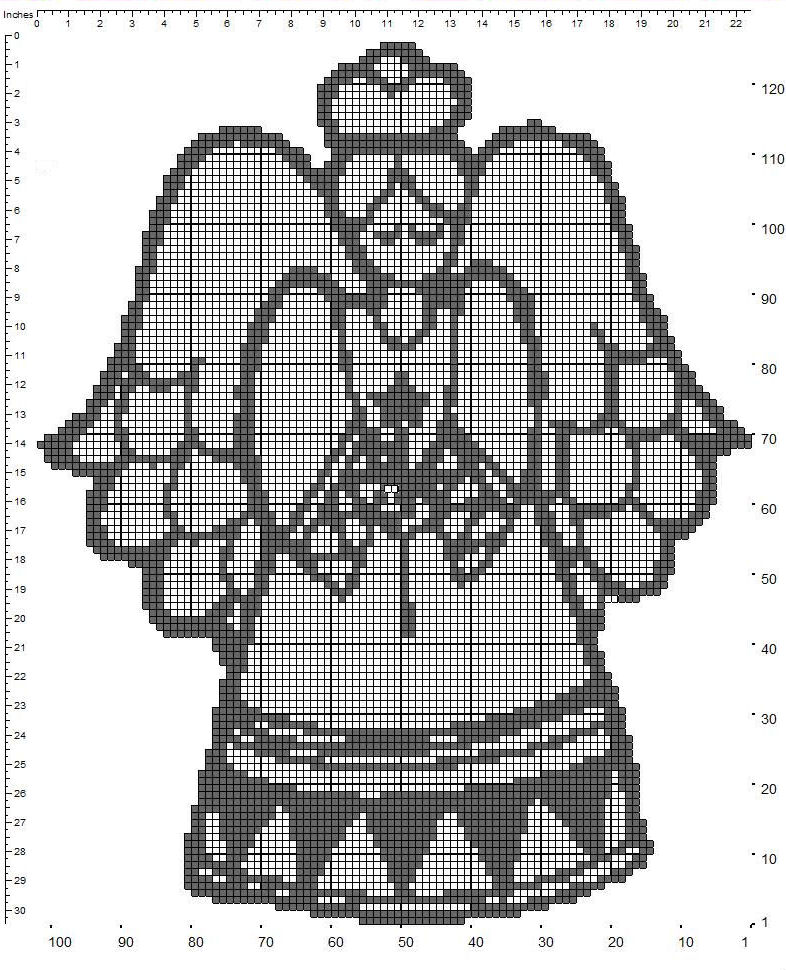
STEP 1: Crochet the angel according to the chart and chart instructions.
STEP 2: Starch and press the angel with the pressing cloth, iron and ironing board. Use the pressing cloth under the angel to protect the surface of the ironing board. Set angel aside.
STEP 3: Assemble the frame with the angle brackets screwed on each corner using the 4 pieces of pine.
STEP 4: Stretch and Staple the white woven fabric over the frame you just made and staple the fabric to the inside of the frame on the back. Trim away the excess fabric.
STEP 5: Stretch and staple the black velvet on top of the white fabric in the same way as the white fabric. Tuck the edges of both fabrics under the lip of the frame on the inside back to hide the raw edges.
STEP 6: Baste the angel on the front side of the velvet with very large stitches around the perimeter of the angel about 1" from the edges to keep it in place while you stitch the edges of the angel to the fabric. Work through both layers of the fabric. Make sure the perfectly center the angel on the front. I didn't baste so my angel did not come out perfectly centered and it is a little distored. Basting with solve this problem.
STEP 7: With the thread you used to make the angel, tack the edges of the angel to the fabric every ½" or so and work a stitch at the inside and outside of each corner as you come to them. Work one straight line down the center of your angel tacking every ½". This will help keep the angel's stitches from sagging in the middle when it is hanging on the wall. Trim all ends after knotting them on the back side.
NOTE: If you want to hide the stitches on the back, you can get a large piece of cardboard, 30"x30" and tuck it in the back just under the frame to keep it in place.
Design written on Saturday, December 26, 2009. Copyright ©2009 By Julie A. Bolduc p123011
Printing NOTE: When you print the PDF file, make sure to set your printer at borderless printing to get it all.


