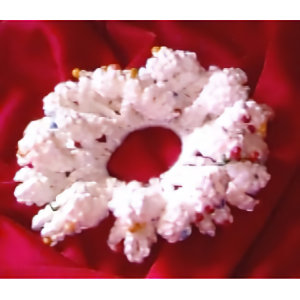
Beaded Spring Scrunchie

Designed by Julie A Bolduc
This beaded scrunchie is just the perfect finishing touch for a casual Springtime outfit. It would look great with a pair of jeans and a tee shirt.
Materials Needed:
130 assorted colors "E" Beads
Large Elastic Hair Band
Southmaid8 Cotton Yarn White or DMC8
Size C aluminum Crochet Hook
Glue
Yarn Needle for weaving in ends
Yarn Thickness: 8thread
Gauge 6sc=1"
Finished Size: 4" diameter
Skill Level: Beginner
String all beads on to yarn. You can make a "needle" out of the yarn. An easy way to do this is to apply glue to about 3" of the end and allow to dry. You may need to roll the thread on a piece of paper (like a snake) as it dries to smooth it out and to make the tip narrow.
Tie the yarn onto the elastic band.
Ch8, *pull up a bead, ch4, sl st in 8ch ch from hook. Ch4, Rep from * 4 times more but on the last one, slst in first st as first slst instead of ch4. Ch4, sc in elastic band. "Arm" Made. Repeat from Beginning until all beads are used up. You should end up with 26 "Arms" Join with a slst to first ch on the first "Arm".
NOTE: You may need to work with the stitches on the elastic to make them go all the way around the elastic. When I was done making the scrunchie, I had about ¾" of elastic left when I ran out of beads, so I just spread the stitches out abit and did some shaking of the scrunchie to try to even out the stitches. You may need to do the same thing. It worked quite well.
Weaving: To weave the ends into the work. Use yarn needle and weave the ends into one of the "arms" out toward the end ofthe "arm" then back toward the middle. Work on the back side of the "arm". Then work the yarn back through the stitches the other way to secure. Besure to try to pierce the threads of the yarn everyonce in a while.
Design Written in March 1998 Copyright © 1998 by Julie A. Bolduc f109002

