Simple Kaleidoscope Toy
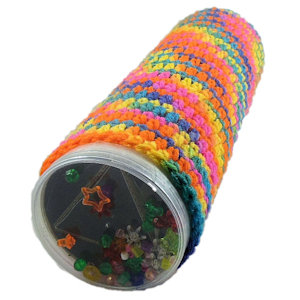 Designed By Julie A. Bolduc
This Simple Kaleidoscope is fast and easy to make and is really meant for kids. Kids can help make the kaleidoscope part of it while you crochet the cover for it. It is made with a recycled tall empty potato crisp can with a clear lid. You will need 2 clear lids to make it work.
Materials Needed
1 Empty Tall 10" x 3" Potato Crisp can (pringles)
2 lids from same type of can.*
Heavy weight stiff cardboard. 8.5" x 11"**
Duck tape of any color, I used black. 3 pieces 10" long
Silver metallic paper***
Heavy weight Clear Shipping Tape 2" wide
Waxed paper
Clear seed beads, clear plastic beads of various shapes. All of them need to be smaller than ¼" diameter.
2 pieces of plain white copy paper, you can used recycled
All purpose white glue
Worsted weight acrylic yarn in any multicolor, color. I used Red Heart Super Saver in Bikini
Size H/8 aluminum crochet hook
Yarn Needle for weaving in ends
Hot Glue & 1 or 2 glue sticks depending on size of stick.
Yarn Thickness: 3mm
Gauge: 4dc=1"
Finished Size: 10" x 3"
Skill Level: Beginner
Prepare Kaleidoscope
Step 1: Clean your empty can. Drill a ¼" hole in the bottom center of the can. 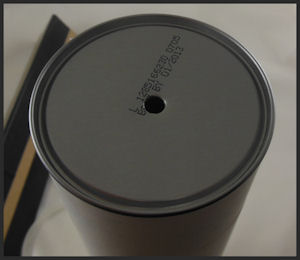
Step 2: Cover can with the 2 sheets of white paper so the blank side is on the outside if you are using recycled paper. Glue into place. 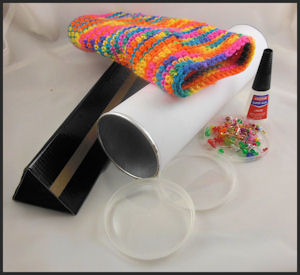
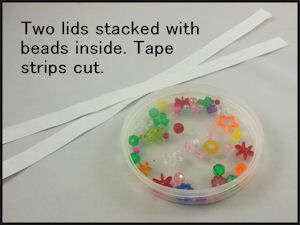 Step 3: Clean lids so they are sparking clean and crystal clear. Set aside. Pour beads into the inside of one lid and stack the other lid, inside facing up, on top of the bead filled lid. You can use the super glue to glue the beads into place if you do not want them to move around inside the lid.
Step 4: Prepare shipping tape. Cut a piece of tape 11"e; long. Stick it onto a piece of waxed paper or sticker paper, sticky side down. I only needed to use one strip of the cut tape.
Step 5: Cut your tape covered wax paper into 1 strip that is .5" by 11" long. This will be used to secure the 2 lids together to trap the beads inside.
Step 6: Take the tape off of the waxed paper and wrap it around both lids around the outside of the rims that are stacked together. Make sure both lids are going the same way so you can place the lid on the can when you are done.
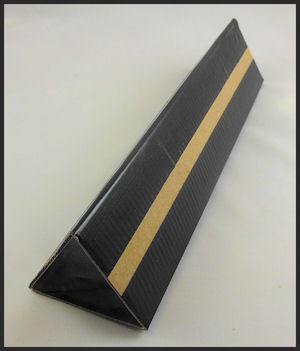 Step 7: Prepare " Mirrors " Cut 3 pieces of cardboard 2 3/8" x 10" in size.
Step 8: Cut 3 pieces of silver metallic paper 3 ¼" x 12"
Step 9:Glue the cardboard to the center back side of each piece of silver paper. Cut the corners off of the silver paper and wrap the flaps to the back side of the cardboard and use packing tape to secure the flaps to the back of the cardboard. Scotch tape just will not hold well.
Step 10: Use duck tap to tape the 3 long silver covered cardboard pieces together to form a long triangular tube. Make sure the silver paper is on the inside.
Step 11: Tuck the triangular tube inside the potato chip can.
Step 12: Snap prepared lid on top of can. Hold the can up to the light and look through the ¼" hole!
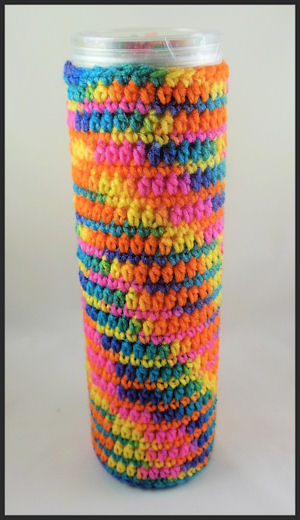 Crocheted Cover:
RND 1: Ch3. Join w/slst to first ch to form ring. Ch1. Working on back bump of chain, sc in each bump of each ch around. This will form a finished looking edge.
RND 2: Ch1, hdc in same st as slst. Hdc in each sc around. Join w/slst to first hdc.
RND 3: Ch1, sc in same st as slst and in each hdc around. Join w/slst to first sc.
RND 4-33: Repeat RNDs 2& 3 Consecutively 15 times more. Fasten off and weave ends into back of work.
Slip crochet cover over can. Use hot glue to glue the top and bottom edge to the top and bottom rim of the can. You may need to stretch it a little bit to be in the exact spot you want it to be in.*NOTE: The colorful disk on this kaleidoscope is removable so you can make different color combination of color disks so you will need 2 lids for each color disk you want to make.
**NOTE: I used the backing piece of cardboard from a package of decorative colorful computer paper, like you find at Wal-mart in the office supply section. It is the paper that is wrapped in plastic wrap and comes in various designs including certificate paper.
*** I used a silver metallic gift bag available at the Dollar Tree but you can use anything that is at least 2.5" wide by 10" long and has a very shiny silver finish on one side. You can use real mirror if you like but keep in mind, this is for children. If you have that shiny silver tape for sealing duct work, that will work also. The shiny silver tape for duct work is too expensive to buy just for this project so I used the Dollar Tree gift bag.
Design written on Tuesday, July 03, 2012. Copyright ©2012 By Julie A. Bolduc p113022

