
Number Tags for Glazing Beads
 Designed By Julie A. Bolduc
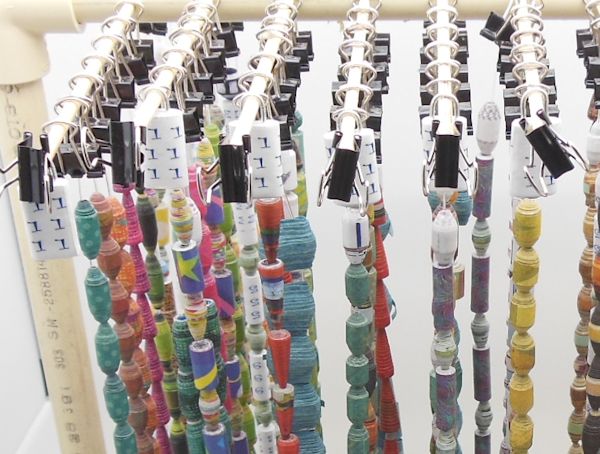
These beads are meant for use with the Paper Bead Drying Racks I have designed and have instructions and videos for. They are used to keep track of how many dips your beads have. They are numbered up to 6 but I generally dip my beads a total of 5 times.
- Materials Needed
- PDF File of the Bead sheet needed to make the beads, included.
- 1/16" paper bead roller
- Paper Clips, head pins or 2" pieces of 20 gauge or paper clip wire, 1 for each number bead tag you want to make.
- Recycled copy paper of choice 8-1/2" x 11"
- Paper Cutting Tool
- White Glue for gluing end of paper down
- Favorite Glaze and Glazing Supplies
- Printer
- Needle Nose Pliers for making the regular tube bead number tags.
Note: These instructions will show you how to make 2 types of hanging bead tags. One is with the use of paper clips and the other is with head pins or wire. You can use paper clip wire instead of your good craft wire or head pins. I used plastic coated paper clips that are 1-1/10" long for the tags that are made with paper clips. For the other ones, I used plain paper clips that were straightened and cut.
Finished Size: 3/4" x 5mm or 1/2" if made with paper clips
Skill Level: Intermediate
Instructions
Step 1: Using your printer, set with margins at zero and making sure to set your printer to print borderless, print as many copies of the PDF file as needed for as many beads that you want. . Each bead sheet will make 2 of each number bead so if you want to make a dozen of each bead, you will need to print 6 copies of the bead sheet.
Step 2: Cut your strips using your favorite cutting method.
Making Tube Bead Number TagsStep 3: Rolling Your beads for use with wire. Roll your beads as you normally would using the 1/16" paper bead roller.
Step 4: Glazing your regular beads. Glaze your rolled beads the way you normally would strung on fishing line and dip several at once.
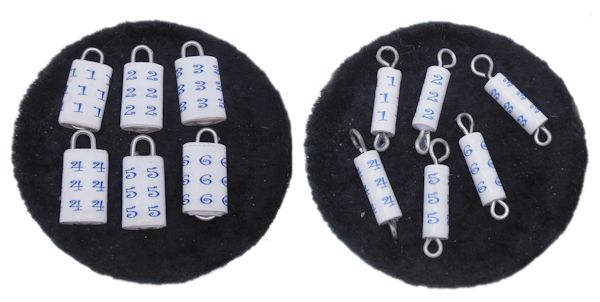
Step 5: Finishing your rolled beads to make them into number tags. The rolled beads can be turned into number tags by either putting them on head pins and making a simple loop at the top or you can make a tiny simple loop on a piece of wire first, adding the bead and making a bigger simple loop at the top. Tip: to make the tiny simple loop at the bottom, use the narrow end of your needlenose pliers. To make the larger hanging loop at the top, use the widest part of your needle nose pliers.
Making Paper Clip Number TagsStep 3: Wrapping your beads on the paper clips. Leave a gap at the top and line up the bottom of your paper clip with the bottom of your paper strip and wrap the paper around the paper clip. You want the gap at the top so you can hang your tag on the paper bead drying rack dowels or skewers. Glue the paper to the paper clip at the first few turns to secure it into place. Make sure to start with the end without the number and make sure the numbers end up on the outside of your flat bead.
Step 4: Glazing the paper clip Beads. Hold onto the wire loop at the top of the flat bead and dip it into the glaze and hang it on your bead drying rack. Do this 4 times with your watery glaze or PC-Petrifier. Then do one final coat of your top coat such as Vibrance or Judikins Diamond Glaze. Once these flat number beads with the paper clips inside them are dry, they are done and ready to use!
Storing your Number Beads: I have a little storage container I bought through Amazon.com. It is made by Plano and called Original Stowaway, 6 Fixed Compartments. Model number 3450-46.


Design written on October 20, 2014. Copyright ©2014 By Julie A. Bolduc f206002
Paper Bead CraftsThis free paper beaded pattern is for personal use only and is not to be resold.
All items in our online shop ship free within the US only. I currently offer U.S. shipping only and it is from rural Maine. Delivery can vary from 2–14 days depending on your distance from Maine. Expedited shipping is not available.
Please note: I am now selling all of my paper bead making tools and other items from this web site using Paypal payments.
I have removed all of my paper bead making tools from Amazon. My Kindle crochet pattern books and paper template paperback books continue to be available on Amazon, as they are printed and fulfilled directly by Amazon. A limited number of paper bead making tools remain available on Etsy but I am not linking to those tools from this site.
Random Quick Tip!
Sewing Thread SaversThese are also called, "beginners and enders", chargers, and perhaps a few other names. I love this tip and use it every day!. What are they? Little pieces of fabric that you begin and end stitching with at the beginning and end of your seams. I call them thread savers because they save your thread instead of pulling out 6 or more inches of thread, then cutting it, after you sew a seam, the little piece of fabric stays right under your presser foot. My tip is, I use the selveges from my fabric to use as thread savers. I make sure I have at least a 1 by 2 inch piece to fold in half to put under my presser foot. That is the only size you actually need. When the folded selvege piece is full of thread, just toss it in the trash. Actually, I toss it into my fabric recycle bag I save for use in stuffing things I make.