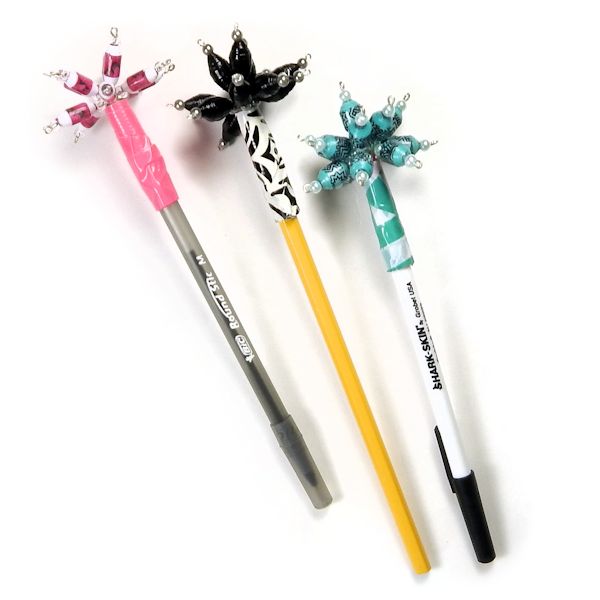
Paper Bead Pen or Pencil Topper

Designed By Julie A. Bolduc
Don't throw away your old pen caps! Instead, decorate the top of your pen or pencil with this beaded topper! Use colors for any time of year! This pen or pencil topper is fun to make and uses a recycled pen cap as a base!
- Materials Needed for each Pen or Pencil Topper
- 1 old pen cap
- 14 pieces of 20 Gauge craft wire in either silver or gold color, 2" long or you can use eye pins
- 13 tapered paper beads up to 5/8" long by up to 10mm in diameter
- 26 4mm round or size 6/0 seed beads
- Duck Tape, 2" long piece and 1/4" long piece
- Wire Cutters and Needle Nose Pliers
- Awl or Phillips Head Screwdriver
Finished Size: 3" Long x 2" at widest point
Skill Level: Intermediate
Instructions
Step 1: Make a simple loop at one end of each of all but one of the pieces of wire. No need to do this if you are using eye pins already made. If you are using eye pins, cut the eye off of one end of only ONE piece.
Step 2: String all of the 13 eye pins onto the pin without the eye or loop at the end. Bend the wire, the other pieces are on in half making sure to bunch all of the other pins together as tight as possible and twist the ends together 3 or 4 times to lock in the 13 eyepins in a tight bundle. Trim the excess wire from the one you twisted as close to the twist as possible.
Step 3: Wrap the 1/4" x 2" piece of duck tape around the eyes of the bundle of eye pins to lock them in place and to provide a surface for friction inside the pen cap.
Step 4: Cut the tail off of the pen cap if there is one with your wire cutters so it is flush with the edge of the cap.
Step 5: Using either your awl or screwdriver, pop the little plastic bit out of the top of the pen cap. Most pen caps have air vents in the top that make it easy to poke a hole in the top of the pen cap.
Step 6: Push your taped bundle of wires up inside your pen cap straight ends first. Jam it in there tight so the taped end cannot go through the hole in the pen cap you just made. If needed, wrap another 1/4" wide piece of duck tape around the bundle of wires over the first one. (Personally I have never had to do this.) Use a pencil with a full eraser to push the bundle of wires as tight into the top of the pen cap as possible.
Step 7: Working one by one, start placing your beads on your wires. 4mm, large bead, 4mm. Bend the end of the wire next to the 4mm bead and cut it to just less than 1/4" and make a very tiny simple loop. Repeat for the rest of the wires. Arrange as desired!
Step 8: Wrap 2" piece of duck tape around the pen cap to cover it up. Trim the excess at the bottom of the cap.
Step 9: Place your new pencil topper on either your pen or pencil! Enjoy!
Design written on May 3, 2015. Copyright ©2015 By Julie A. Bolduc f206005

