
Twelve Triangles Block
Using the FrankenQuilt Method formerly the Quilt as You Piece Method
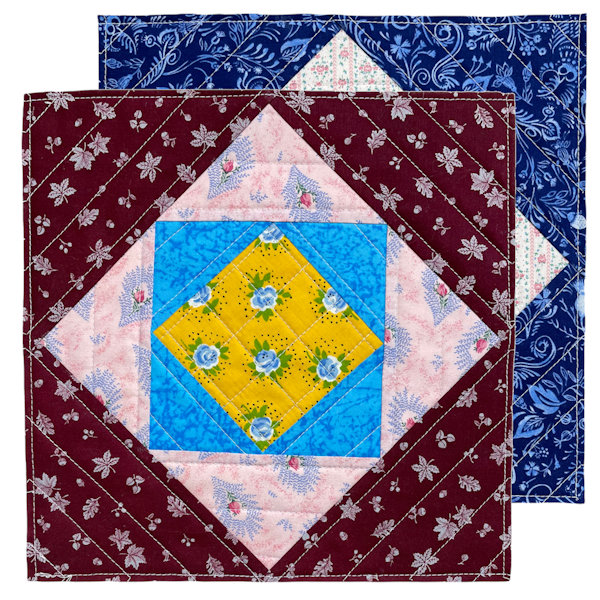
This is the 8th quilt block tutorial in a series on how to make quilt blocks using the FrankenQuilt Method formerly the Quilt as You Piece Method. This tutorial is not about making a quilt, it is about making the "Quilt as You Piece" block that you can add to the type of quilt where the blocks are joined after they are made, quilted then joined to other blocks. Like a Quilt as You Go Quilt. The size of the block I am making for this tutorial is a 10" x 10" block. The measurements for the cut size can be rounded up to the next 1/8" to allow for variances while you work.
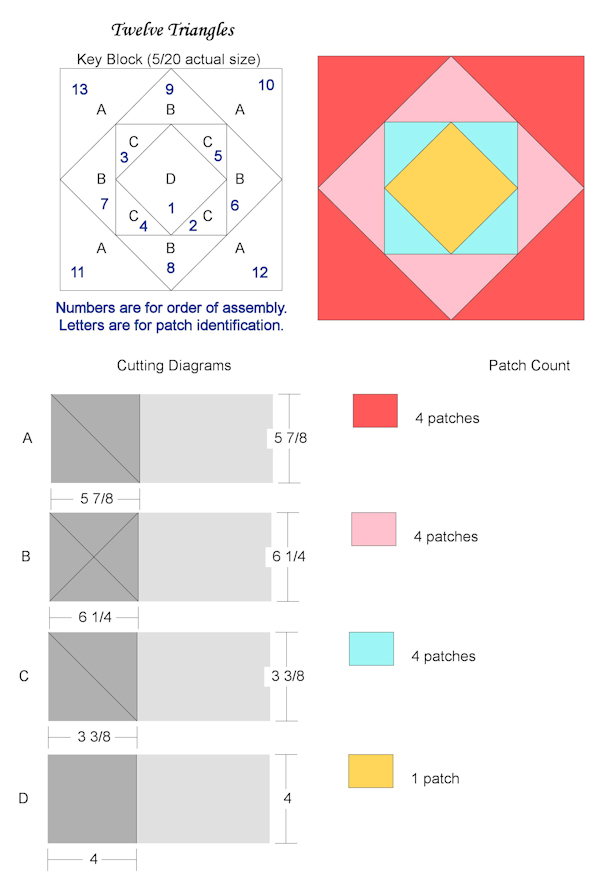
Materials NeededFor each block, you will need: In the list below, I have made the pieces bigger in order to make it easier to be accurate at trimming, after each section is added.
- 4 Pieces Fabric, 6.5"x6.5" 2 each of 2 prints. Piece A
- 2 Pieces Fabric, 6.5" x 6.5" 1 each of 2 prints. Piece B
- 4 Pieces Fabric, 4" x 4" 2 each of 2 prints. Piece C
- 2 Pieces Fabric, 4.5" x 4.5" 1 each of 2 prints. Piece D
- 2 Pieces Cotton Batting, 6.5" x 6.5" Piece A
- 1 Pieces Cotton Batting, 6.5" x 6.5" Piece B
- 2 Pieces Cotton Batting, 4" x 4" Piece C
- 2 Piece Cotton Batting, 4.5" x 4.5" Piece D
- Cotton Sewing thread in neutral color, 50wt preferred.
- Washable Liquid Glue
- Washable Glue Stick
These are the tools I used. Use what you have.
- Rotary Cutter & Cutting Mat
- Pair of Fabric Scissors
- Temporary Marking Device
- 18"x3" quilt ruler
- 10.5"x10.5" Square Ruler
- Dry Iron & Pressing Board
Basic Instructions
This pattern sheet just provides what materials you need and what size pieces you need to make a 10" block and in what order to sew the pieces of the block together. It does not go into detail how I put them together in the Quilt as You Piece manner, please refer to our tutorial of the Five Strip Rail Fence Block for the basic concept and instructions on how to do Quilt as You Piece for this block and all other blocks in this series.
What you do for the center block is, make a sandwich with your 4.5" x 4.5" squares (Piece D), quilt it the way you want it, then trim it down to 4"x4".
After the center square is done, follow the numbering Chart and the layering methods explained in the Five Strip Rail Fence Block to put this block together. You can also see how this block is put together by watching our Video,
Written on November 3, 2021, by Julie A Bolduc © 2021 by Julie A Bolduc of Just Plain Fun p401006
All items in our online shop ship free within the US only. I currently offer U.S. shipping only and it is from rural Maine. Delivery can vary from 2–14 days depending on your distance from Maine. Expedited shipping is not available.
Please note: I am now selling all of my paper bead making tools and other items from this web site using Paypal payments.
I have removed all of my paper bead making tools from Amazon. My Kindle crochet pattern books and paper template paperback books continue to be available on Amazon, as they are printed and fulfilled directly by Amazon. If you would like to shop my Etsy Store, follow the link in the header above.
Random Quick Tip!
Pretty Wood CollagesKeep some old magazines for kids to use to cut out pretty pictures and make collages with them gluing them to sanded pre made wood plaques then seal the collage with several coats of clear varnish. You will have a treasure that your kids made for years to come. During the holidays you could also do the same on wooden cut outs for Christmas Ornaments.