
Stuffed Pumpkin
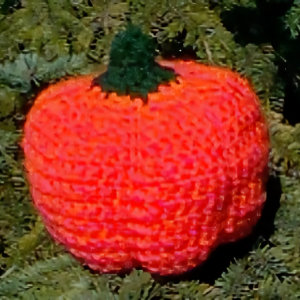 Designed by Julie A. Bolduc
This stuffed pumpkin would be really cute as a Halloween Centerpiece surrounded by fall leaves! You could also make it with size 10 thread and a size 7 steel hook to make small pumpkins.
Materials Needed:
1 skein 3oz Orange worsted weight yarn.
Scrap of Green Worsted weight yarn. Pop-N-Yarn was used in the example.
Size H aluminum crochet hook
Polyester Stuffing
Yarn needle
Gauge 9dc=2"
Yarn Thickness 4mm
Finished Size=7"diameter 6" high from tip of stem to bottom
Skill Level: Beginner
Instructions
With Green
RND 1: Ch4, join w/slst to first ch to form ring. Ch3, work 16 dc in ring. Join w/slst to first dc. This is to hide the ch3. Fasten off green.
Join Orange in any st.
RND 2: Ch1, sc in same st as slst. 2dc in next st. *Sc in next st. 2dc in next st. Rep from * around. Join w/slst to first sc.
RND 3: Ch1, sc in same st as slst. 2dc in each of the next 2 dcs. *Sc in next sc. 2dc in each of the next 2 dc. Rep from * around. Join w/slst to first sc.
RND 4: Ch1, sc in same st as slst. 2dc in next dc. Dc in each of the next 2 dc. 2dc in next dc. *Sc in next dc. 2dc in next dc. Dc in each of the next 2 dc. 2dc in next dc. Rep from * around. Join w/slst to first sc.
RND 5-13: Ch1, sc in same st as slst. Dc in each of the next 6 dcs. *Sc in next sc. Dc in each of the next 6 dcs. Rep from * around. Join w/slst to first sc.
RND 14: Ch1, sc in same st as slst. (Yo, insert hook in next st, draw up a lp and draw through 2 lps on hook, insert hook in next st, yo draw lp through st, yo and draw through all lps on hook Dec. made.) Dc in each of the next 2 dc. Dec1. *Sc in next sc. Dec1. Dc in each of the next 2 dcs. Dec1. Rep from * around. Join w/slst to first sc.
RND 15: Ch1, sc in same st as slst. Dec2. *Sc in next sc. Dec2. Rep from * around. Join w/slst to first sc. Fasten off Orange. Stuff pumpkin until desired effect is acheived.
RND 16: Join green in any stitch. Ch3. Dec1. *Dc in next st. Dec1. Rep from * around. Join w/slst to top of ch3.
RND 17 & 18: Ch3. dc in each st around. Join w/slst to top of ch3. At the end of RND 18, fasten off leaving at least a 6" length. Run a gathering stitch around the top and draw up tight. Weave ends into work then trim off.
Designed on Thursday, August 27, 1998. Copyright © 1998 by Julie A. Bolduc p116005
All items in our online shop ship free within the US only. I currently offer U.S. shipping only and it is from rural Maine. Delivery can vary from 2–14 days depending on your distance from Maine. Expedited shipping is not available.
Please note: I am now selling all of my paper bead making tools and other items from this web site using Paypal payments.
I have removed all of my paper bead making tools from Amazon. My Kindle crochet pattern books and paper template paperback books continue to be available on Amazon, as they are printed and fulfilled directly by Amazon. If you would like to shop my Etsy Store, follow the link in the header above.
Random Quick Tip!
What to do With SnowflakesSnowflakes and other thread motifs make wonderful appliques for shirts, tablecoths, pillows, quilts, napkins and more! This takes time but all you need to do is position the motif where you want it to be and with matching sewing thread, tack them down using very small stitches about 1/4" apart. There is another way of doing this as well and that is using Ok to Wash it glue from Aleene's. Just brush the glue on the back side of the motif and position it where you want it to be. When it is dry, just tack it down around the outer edges for added security. Imagine a bunch of white snowflakes appliqued to a sky blue tablecoth!