
Beaded Post Earring Accents
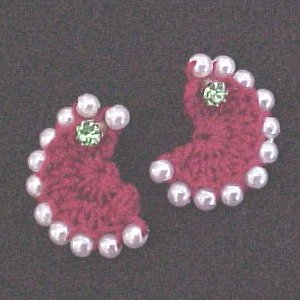
Designed By Julie A. Bolduc
These pretty earrings are actually on a pair of posts. They are meant to be used with any posts you may have. Be creative and use different beads and different colors of threads for a multitude of effects.
Materials Needed
Size 10 crochet cotton in color of choice
22 4mm pearl beads
Size 7 steel crochet hook
Fine needle that will fit through beads
Earring posts of choice
Yarn Thickness: 10thread
Gauge: 10sc = 1"
Finished Size: ¾" across
Skill Level: Beginner
Instructions
Make 2 the same: Make a starting lp. *Pull up a bead. Ch1. Rep from * 10 times more. Ch3. (Insert hook in back lp on top of next bead, yo, pull up a lp. Yo, pull through 1 lp on hook twice.) Rep bet () across. Yo, pull through all lps on hook. Ch1. Fasten off. Weave ends into back of work. Insert posts through work just under one of the end beads to hang in the direction that you want it to hang. Enjoy!
Design written on Friday, July 30, 2004. Copyright ©2004 By Julie A. Bolduc f107002
All items in our online shop ship free within the US only. I currently offer U.S. shipping only and it is from rural Maine. Delivery can vary from 2–14 days depending on your distance from Maine. Expedited shipping is not available.
Please note: I am now selling all of my paper bead making tools and other items from this web site using Paypal payments.
I have removed all of my paper bead making tools from Amazon. My Kindle crochet pattern books and paper template paperback books continue to be available on Amazon, as they are printed and fulfilled directly by Amazon. If you would like to shop my Etsy Store, follow the link in the header above.
Random Quick Tip!
Storing Laminated TemplatesIf you have some of my Laminated marking templates for making paper beads, you can punch holes in them on one side for storing in a three ring binder. The holes should not interfere with being able to mark your papers.