
Wrist Rest Cover
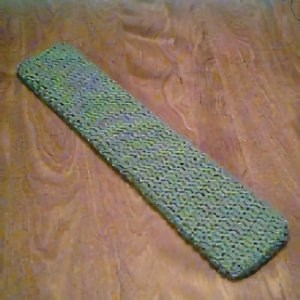 Designed By Julie A. Bolduc
This wrist rest cover is a result of a need. A need to cover my old ugly wrist rest I have had since I got my computer. This is a basic pattern and could be improved upon I am sure. This particular pattern would look wonderful if made with a varigated yarn.
Materials Needed:
2 oz Dawn Sayelle Worsted Weight Yarn. Country Blue was used in the example
Size G Wooden Brittany hook was used but Size H aluminum would work also.
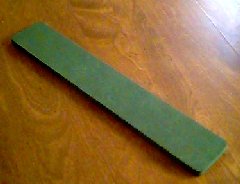
Plain Wrist Rest as in picture
Yarn Needle
Gauge: 4dc=1"
Yarn Thickness: 3mm
Finished Size: 18"x3.5"
Skill Level: Beginner
Instructions
RND 1: Ch 16. Dc in 4th ch from hook and in each ch across. Now you will work around this first row to form a pocket. Ch3. Dc, ch1 dc around post of last dc. V-st made. Dc in base of this same dc on bottom of row. Dc in each st across bottom. V-St on post of ch3 at beginning of row. Dc in top of ch3 and dc and in each dc across. Join w/slst to top of ch3. Now work in the rounds from here on out.
RND 2-30: Ch3. V-St in Vst. Sk next dc. Dc in each of the next 13 dc. V-St in Vst. Sk next dc. Dc in each of the next 12 dc. Join w/slst to top of ch3. At the end of RND 30, ch3, turn.
RND 31: Dc in each of the next 12 dc. Fasten off leaving an 18" length of yarn. This is a flap. Slip the wrist rest into the tube. Using an overhand stitch, sew the flap down to cover the end of the wrist rest. You will sew on 3 sides. (like this symbol. ])
Design written on Sunday, April 18, 1999. Copyright ©1999 By Julie A. Bolduc p114003
All items in our online shop ship free within the US only. I currently offer U.S. shipping only and it is from rural Maine. Delivery can vary from 2–14 days depending on your distance from Maine. Expedited shipping is not available.
Please note: I am now selling all of my paper bead making tools and other items from this web site using Paypal payments.
I have removed all of my paper bead making tools from Amazon. My Kindle crochet pattern books and paper template paperback books continue to be available on Amazon, as they are printed and fulfilled directly by Amazon. If you would like to shop my Etsy Store, follow the link in the header above.
Random Quick Tip!
Yo Yo Templates Made Easy.If you make alot of yoyos a good template for making them of different sizes is to use various sized plastic lids. Put an adress label on a lid and mark on it how big the lid is in inches and centimeters then put it in your craft box. Then when you need a certain size circle for any reason, just pull out the correct size lid to mark your fabric.